Shibori - Dye Resist Part 2
This is Part 2 of a two part series on Shibori dyeing. Part 1 can be found here.
As mentioned in Part 1, Shibori is a Japanese dyeing technique that creates dye-resists in the cloth by folding, pleating, and/or bunching the fabric. These folds are then bound with thread, clamps or rubber bands, preventing the dye from penetrating.
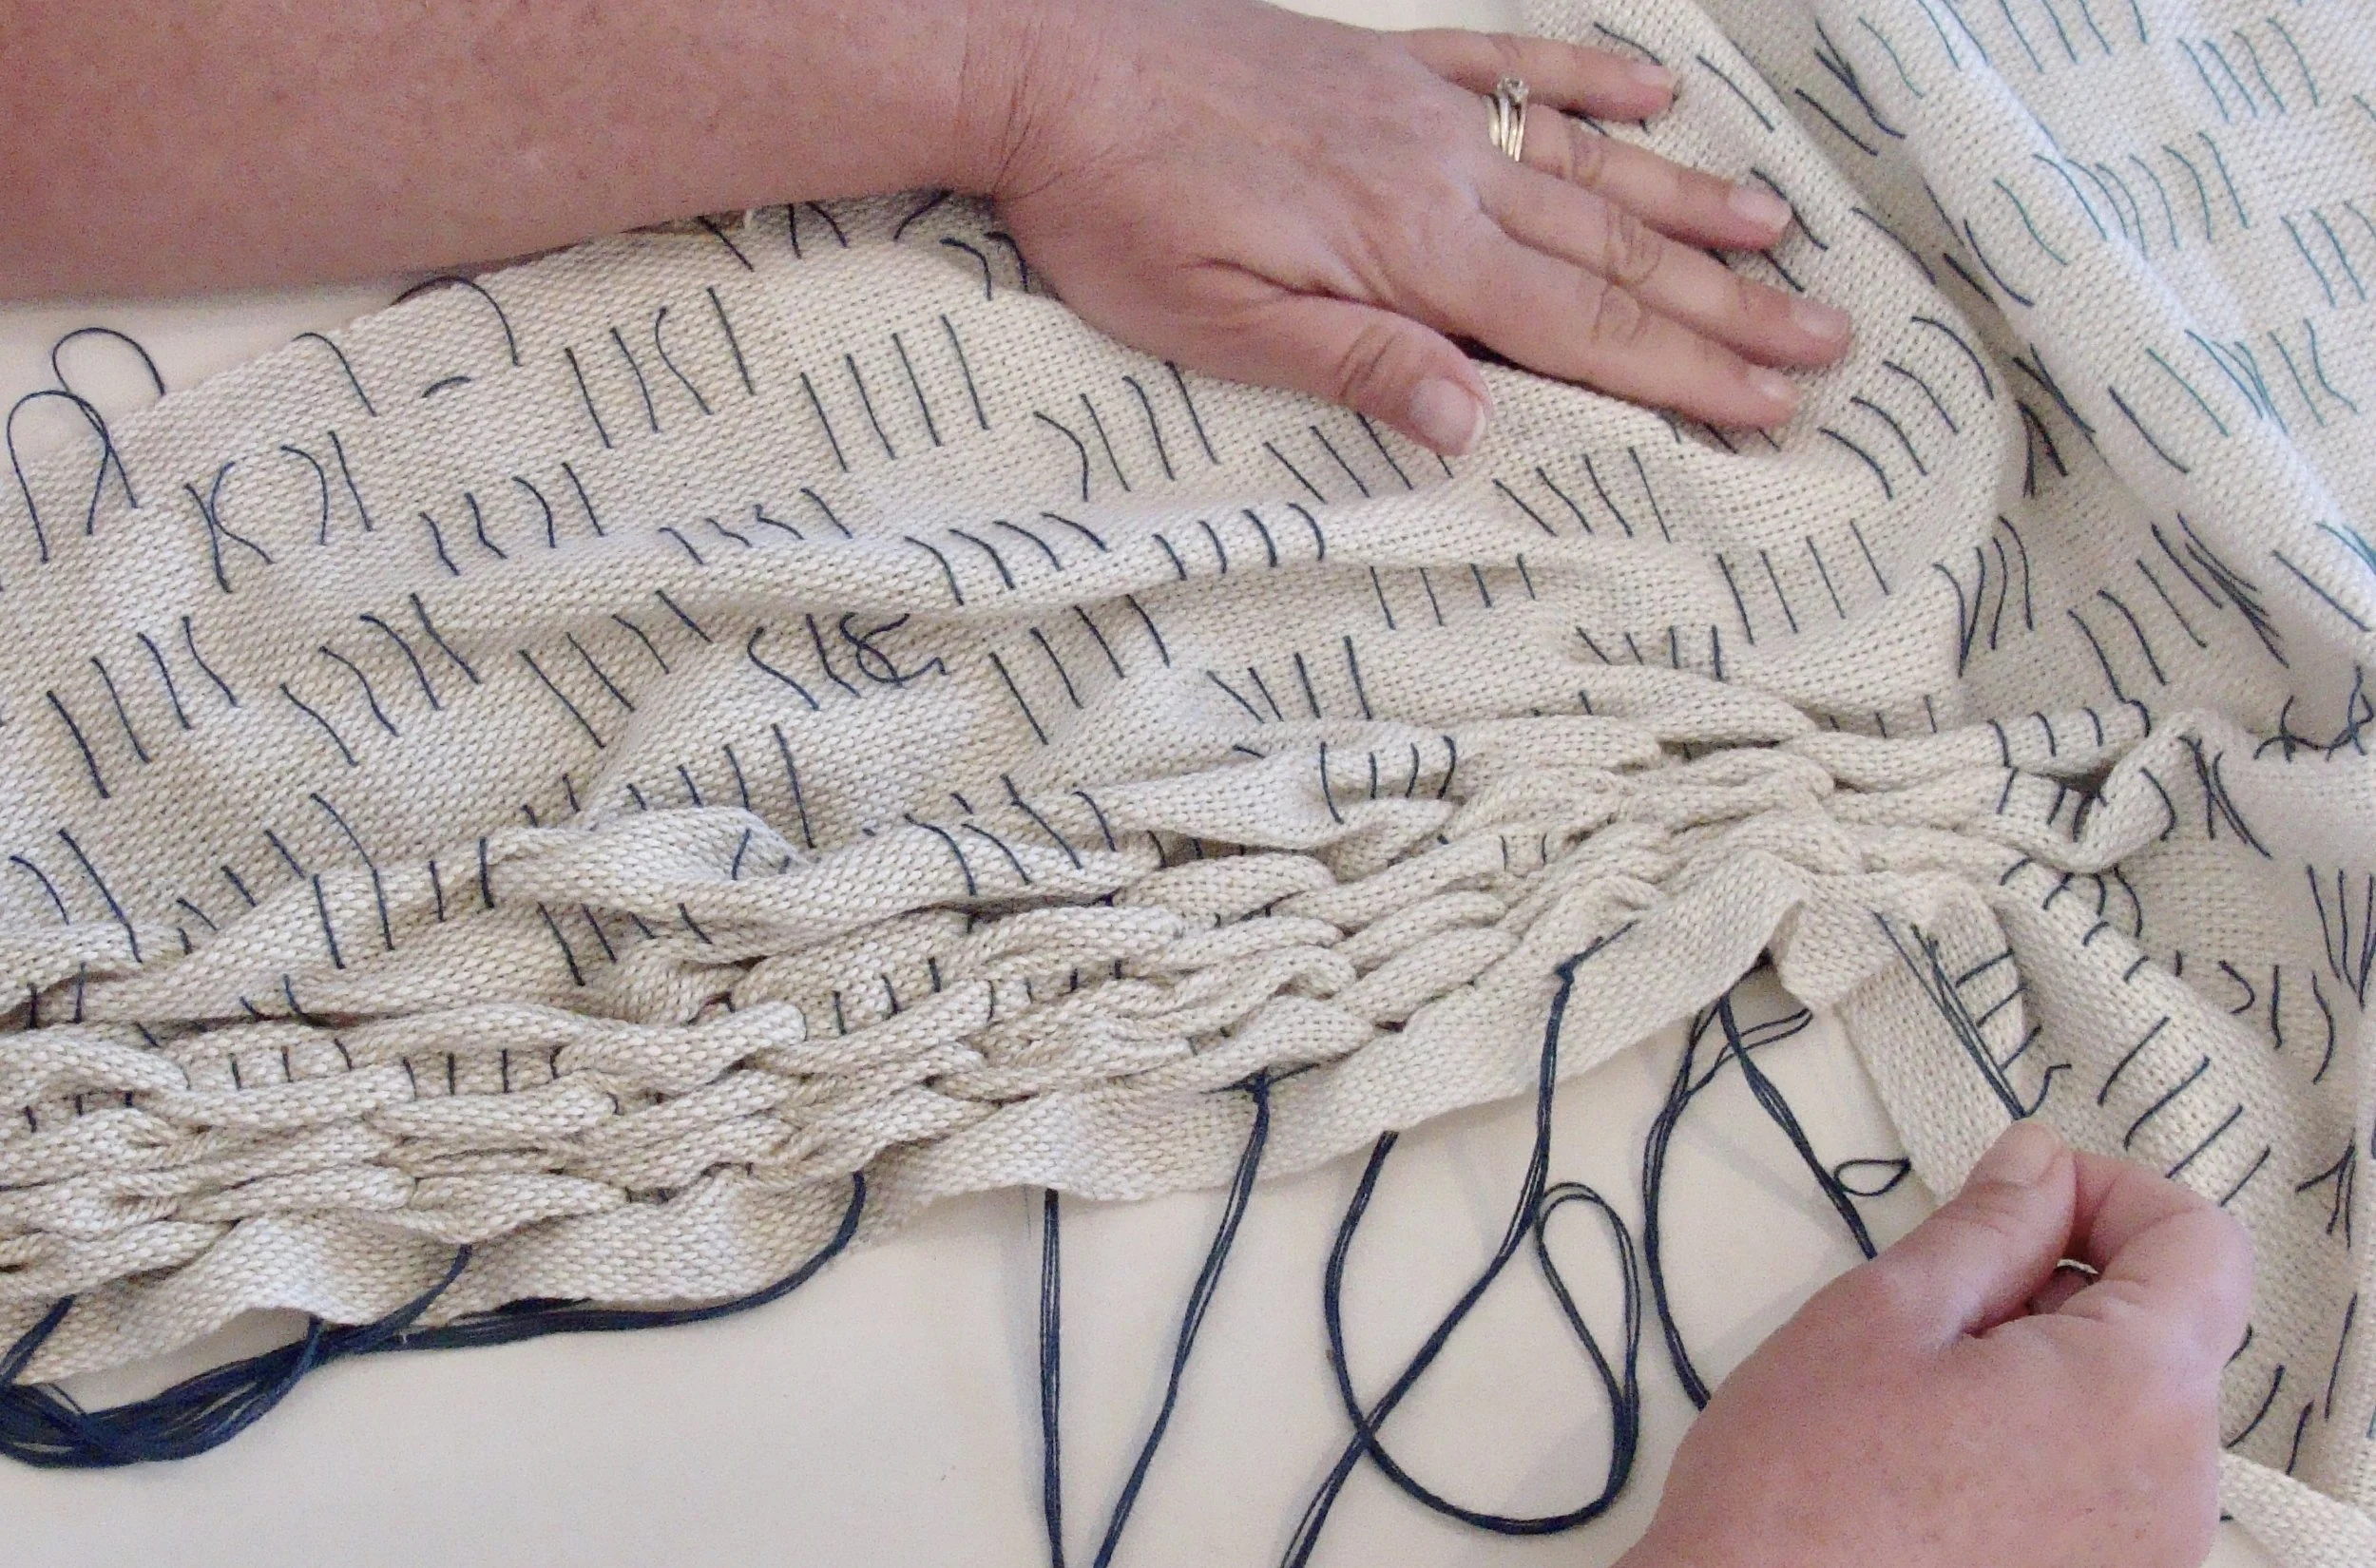
In woven shibori, instead of rubber bands or clamps to create the resist, various stitching methods are applied. Nui or woodbark shibori, uses simple running stitches sewn into the cloth. The stitches can be sewn either by machine or by hand as parallel lines, spirals, or other shaped designs.

The stitches are then pulled and knotted securely, creating pleats that form a resist when the cloth is dyed. The tighter the threads are pulled, the greater the resist contrast. My pleated cloth was gathered to about 2 inches (from a woven 17 inch width).

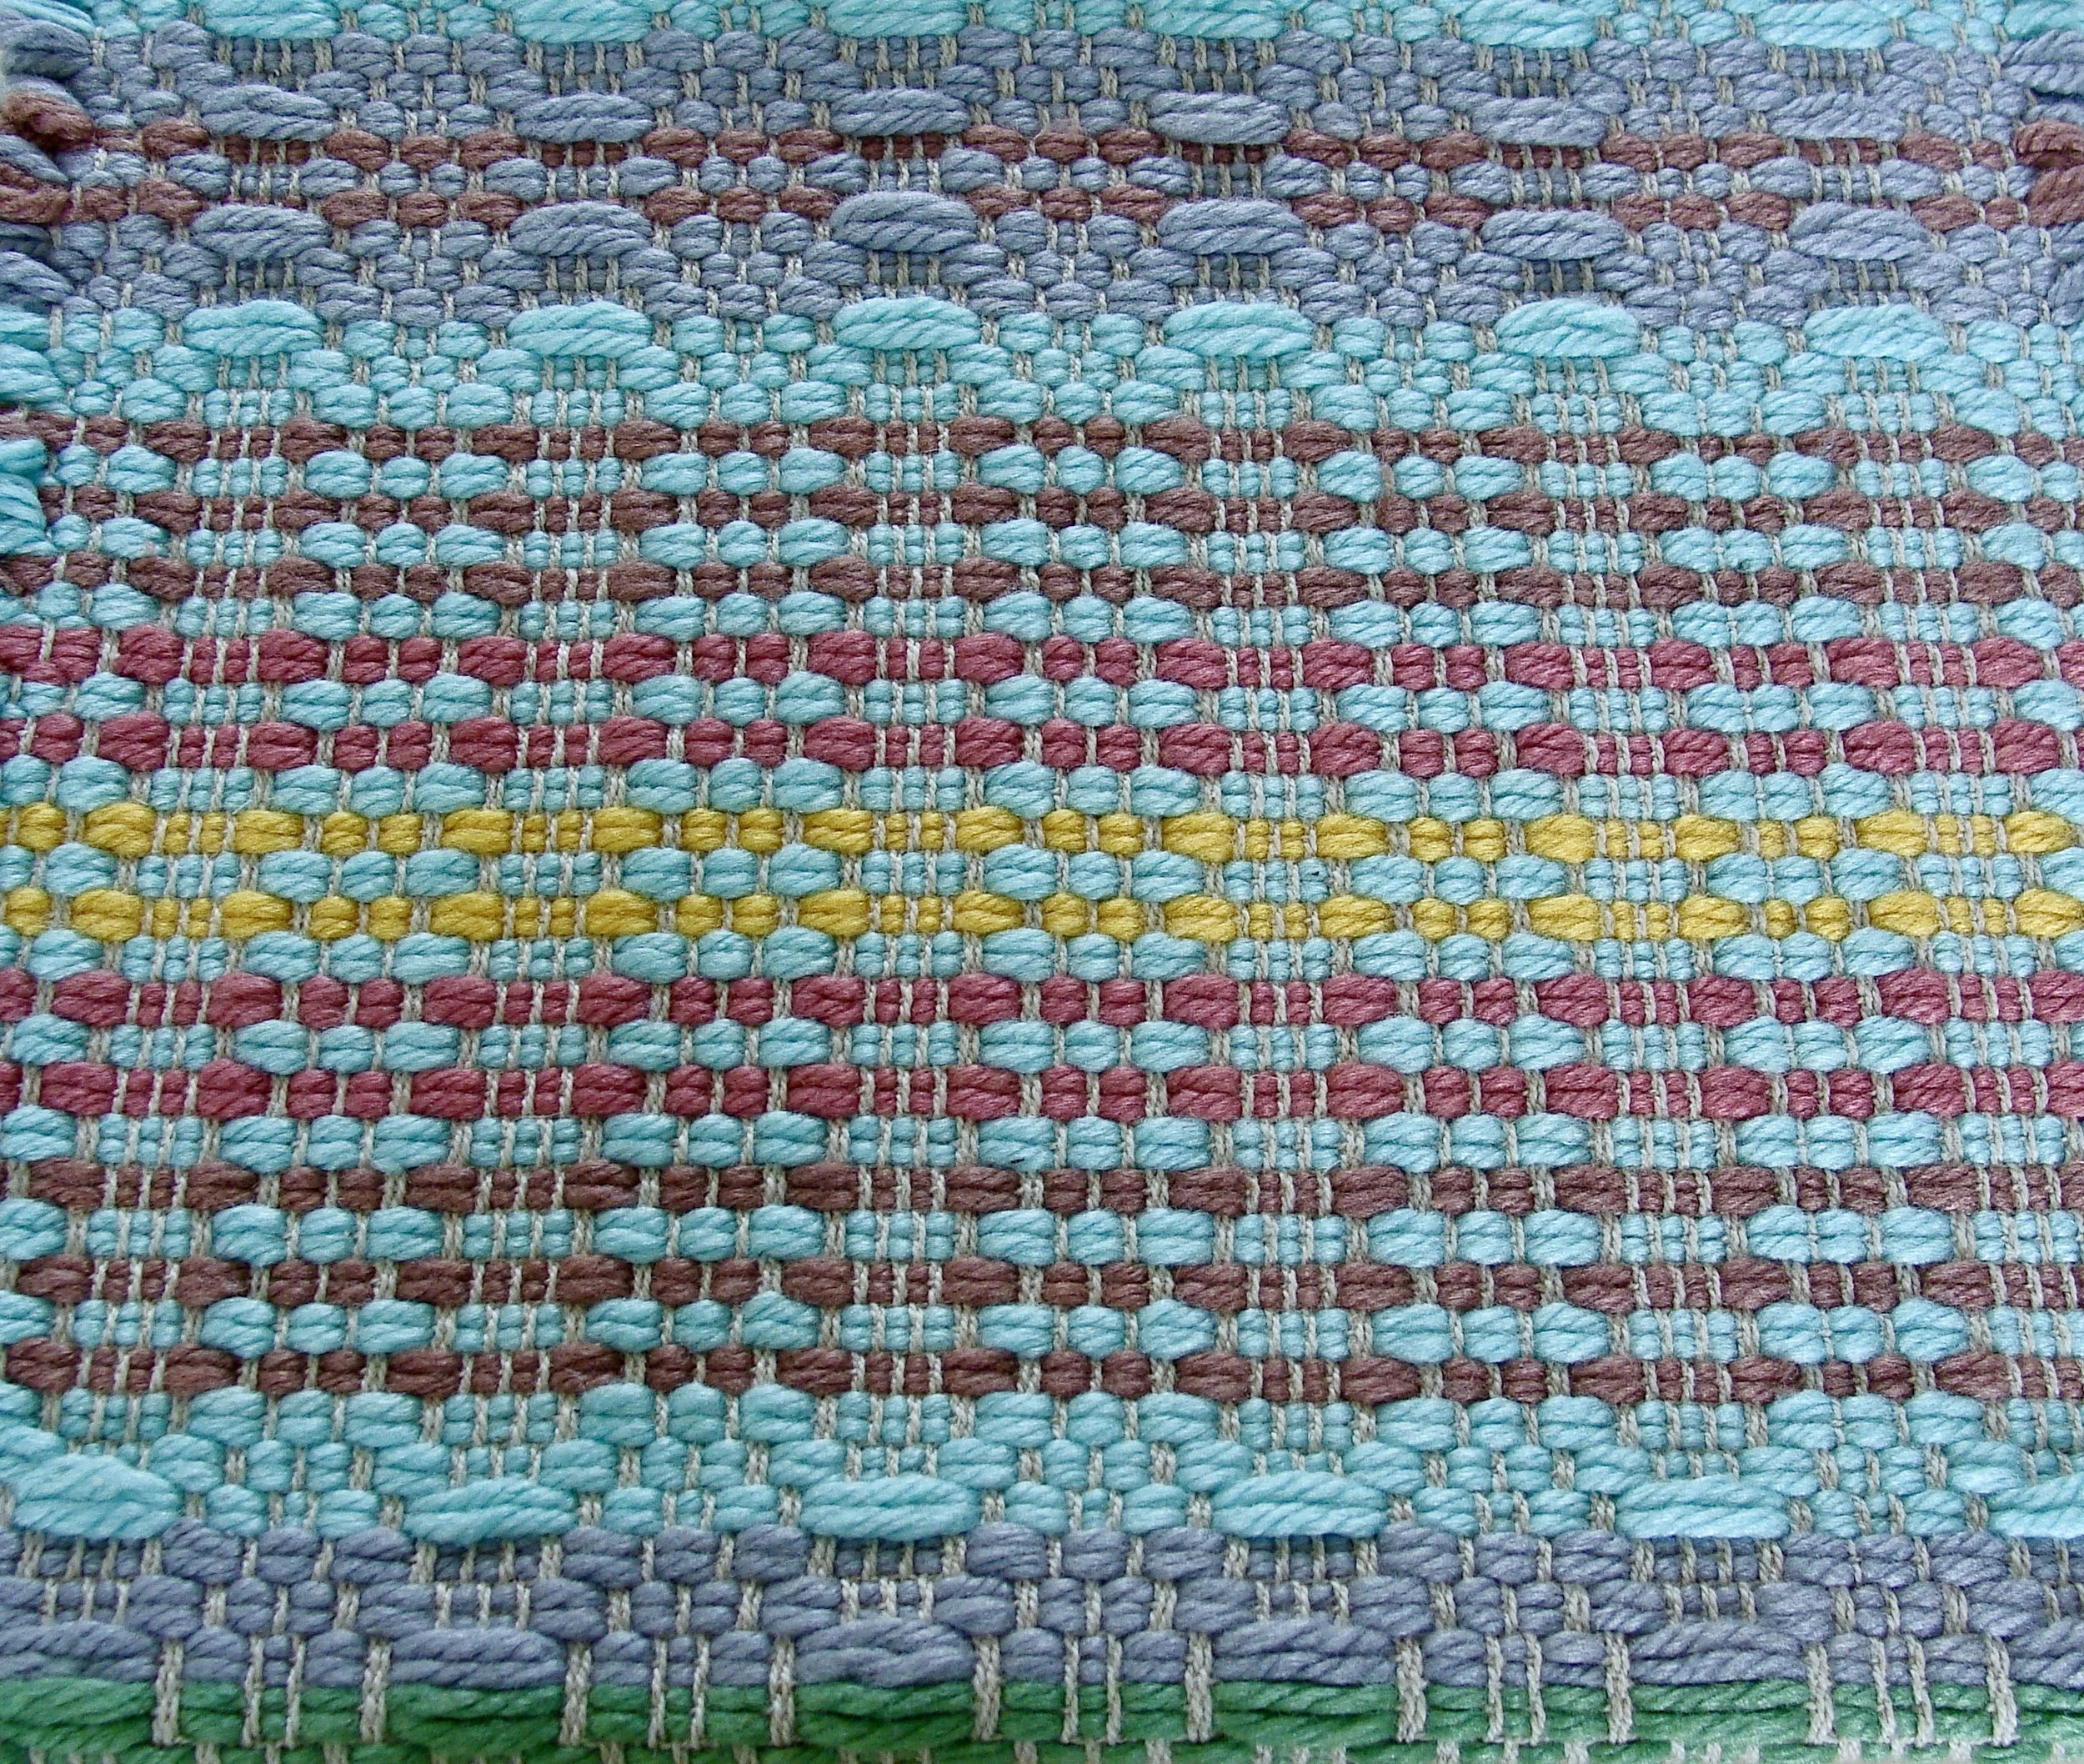
Catharine Ellis, in her book Woven Shibori, modifies the technique to actually weave supplemental pattern threads into her fabric while she is weaving the ground cloth. After the cloth comes off the loom, the pattern threads are pulled, the fabric dyed, the threads cut, and the finished fabric revealed. Not only is there no sewing involved, but this method allows the weaver to create “twill”, “overshot”, “woven lace”, "monk's belt" shibori, and more.
For my project, I chose a table runner by Catharine found in the September/October 2002 issue of Handwoven magazine. 5/2 pearl cotton is used for the warp and ground weft. Catharine recommends cotton as it readily accepts dye and shows the shibori pattern clearly.
For the supplementary weft used as the gathering thread, Catharine suggested 6-strand embroidery floss. I ended up using three different threads that were already on my bobbins from other projects. The majority of my supplementary weft is 10/2 cotton, but I also used a heavier weight rayon thread (probably wouldn't recommend), and embroidery floss. In choosing what to use for the pattern weft, it should be smooth, strong, easily knotted, and—very important!— gather easily without breaking. As to color, remember this is not part of your finished object; it just needs to contrasts with the ground warp and weft.
The Indigo Dyeing Process

Indigo is unique when compared to other natural dyes. It is a vat dye. Vat-dyes, in their natural state, are insoluble in water and have no affinity for fiber. They must be "reduced" chemically to remove oxygen and form a soluble dyestuff that will adhere to fiber.
I used a pre-reduced indigo which has already been combined with reducing agents and dried. Indigo dye is affected by exposure to oxygen, so it is important to keep the container covered as much as possible, and avoid stirring it aggressively or splashing it, which will introduce oxygen into the dye liquid.

The pleated cloth must be thoroughly soaked in water, then excess water and air squeezed out prior to dyeing.

The fabric is slowly submerged in the indigo pot for about 2 minutes; working the dye gently into the unpleated areas on the fabric borders and selvedges. Remember, the exposed edges will take on the dye, but inner areas will not – and that’s what creates the pattern.
Gentle is the operative word with indigo dyeing. Excess agitation introduces oxygen and may reduce the effectiveness of the dye.
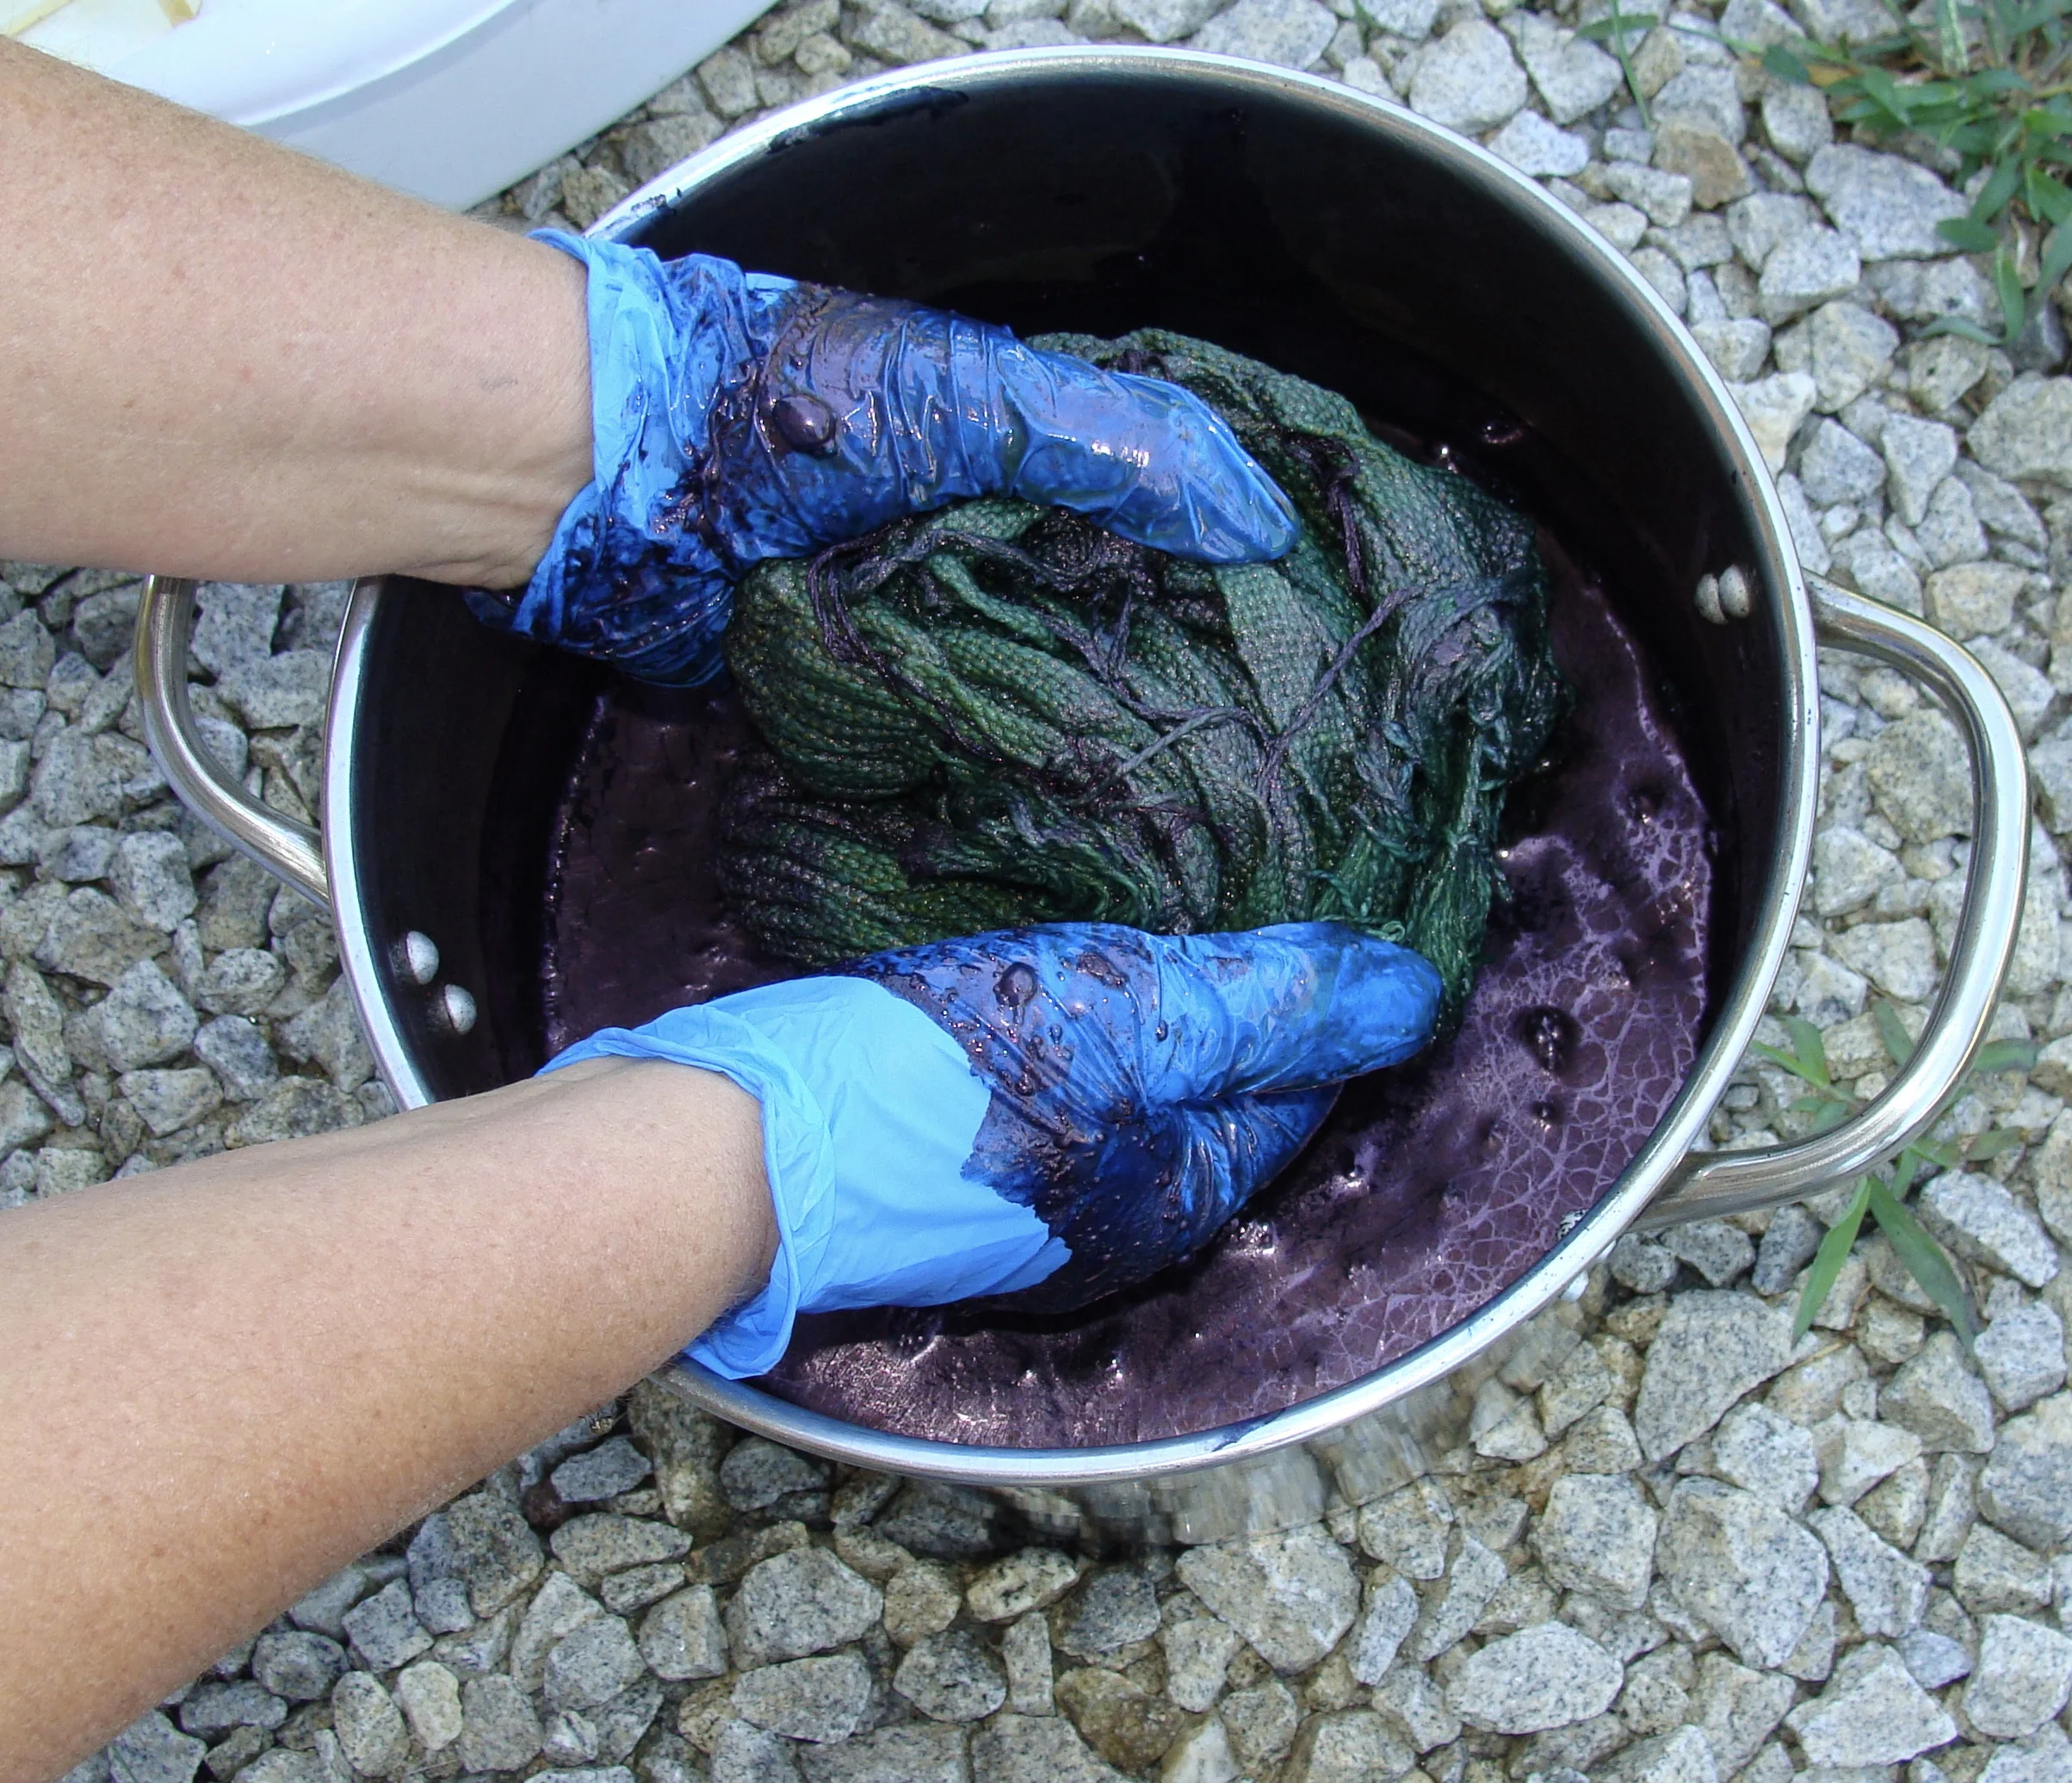
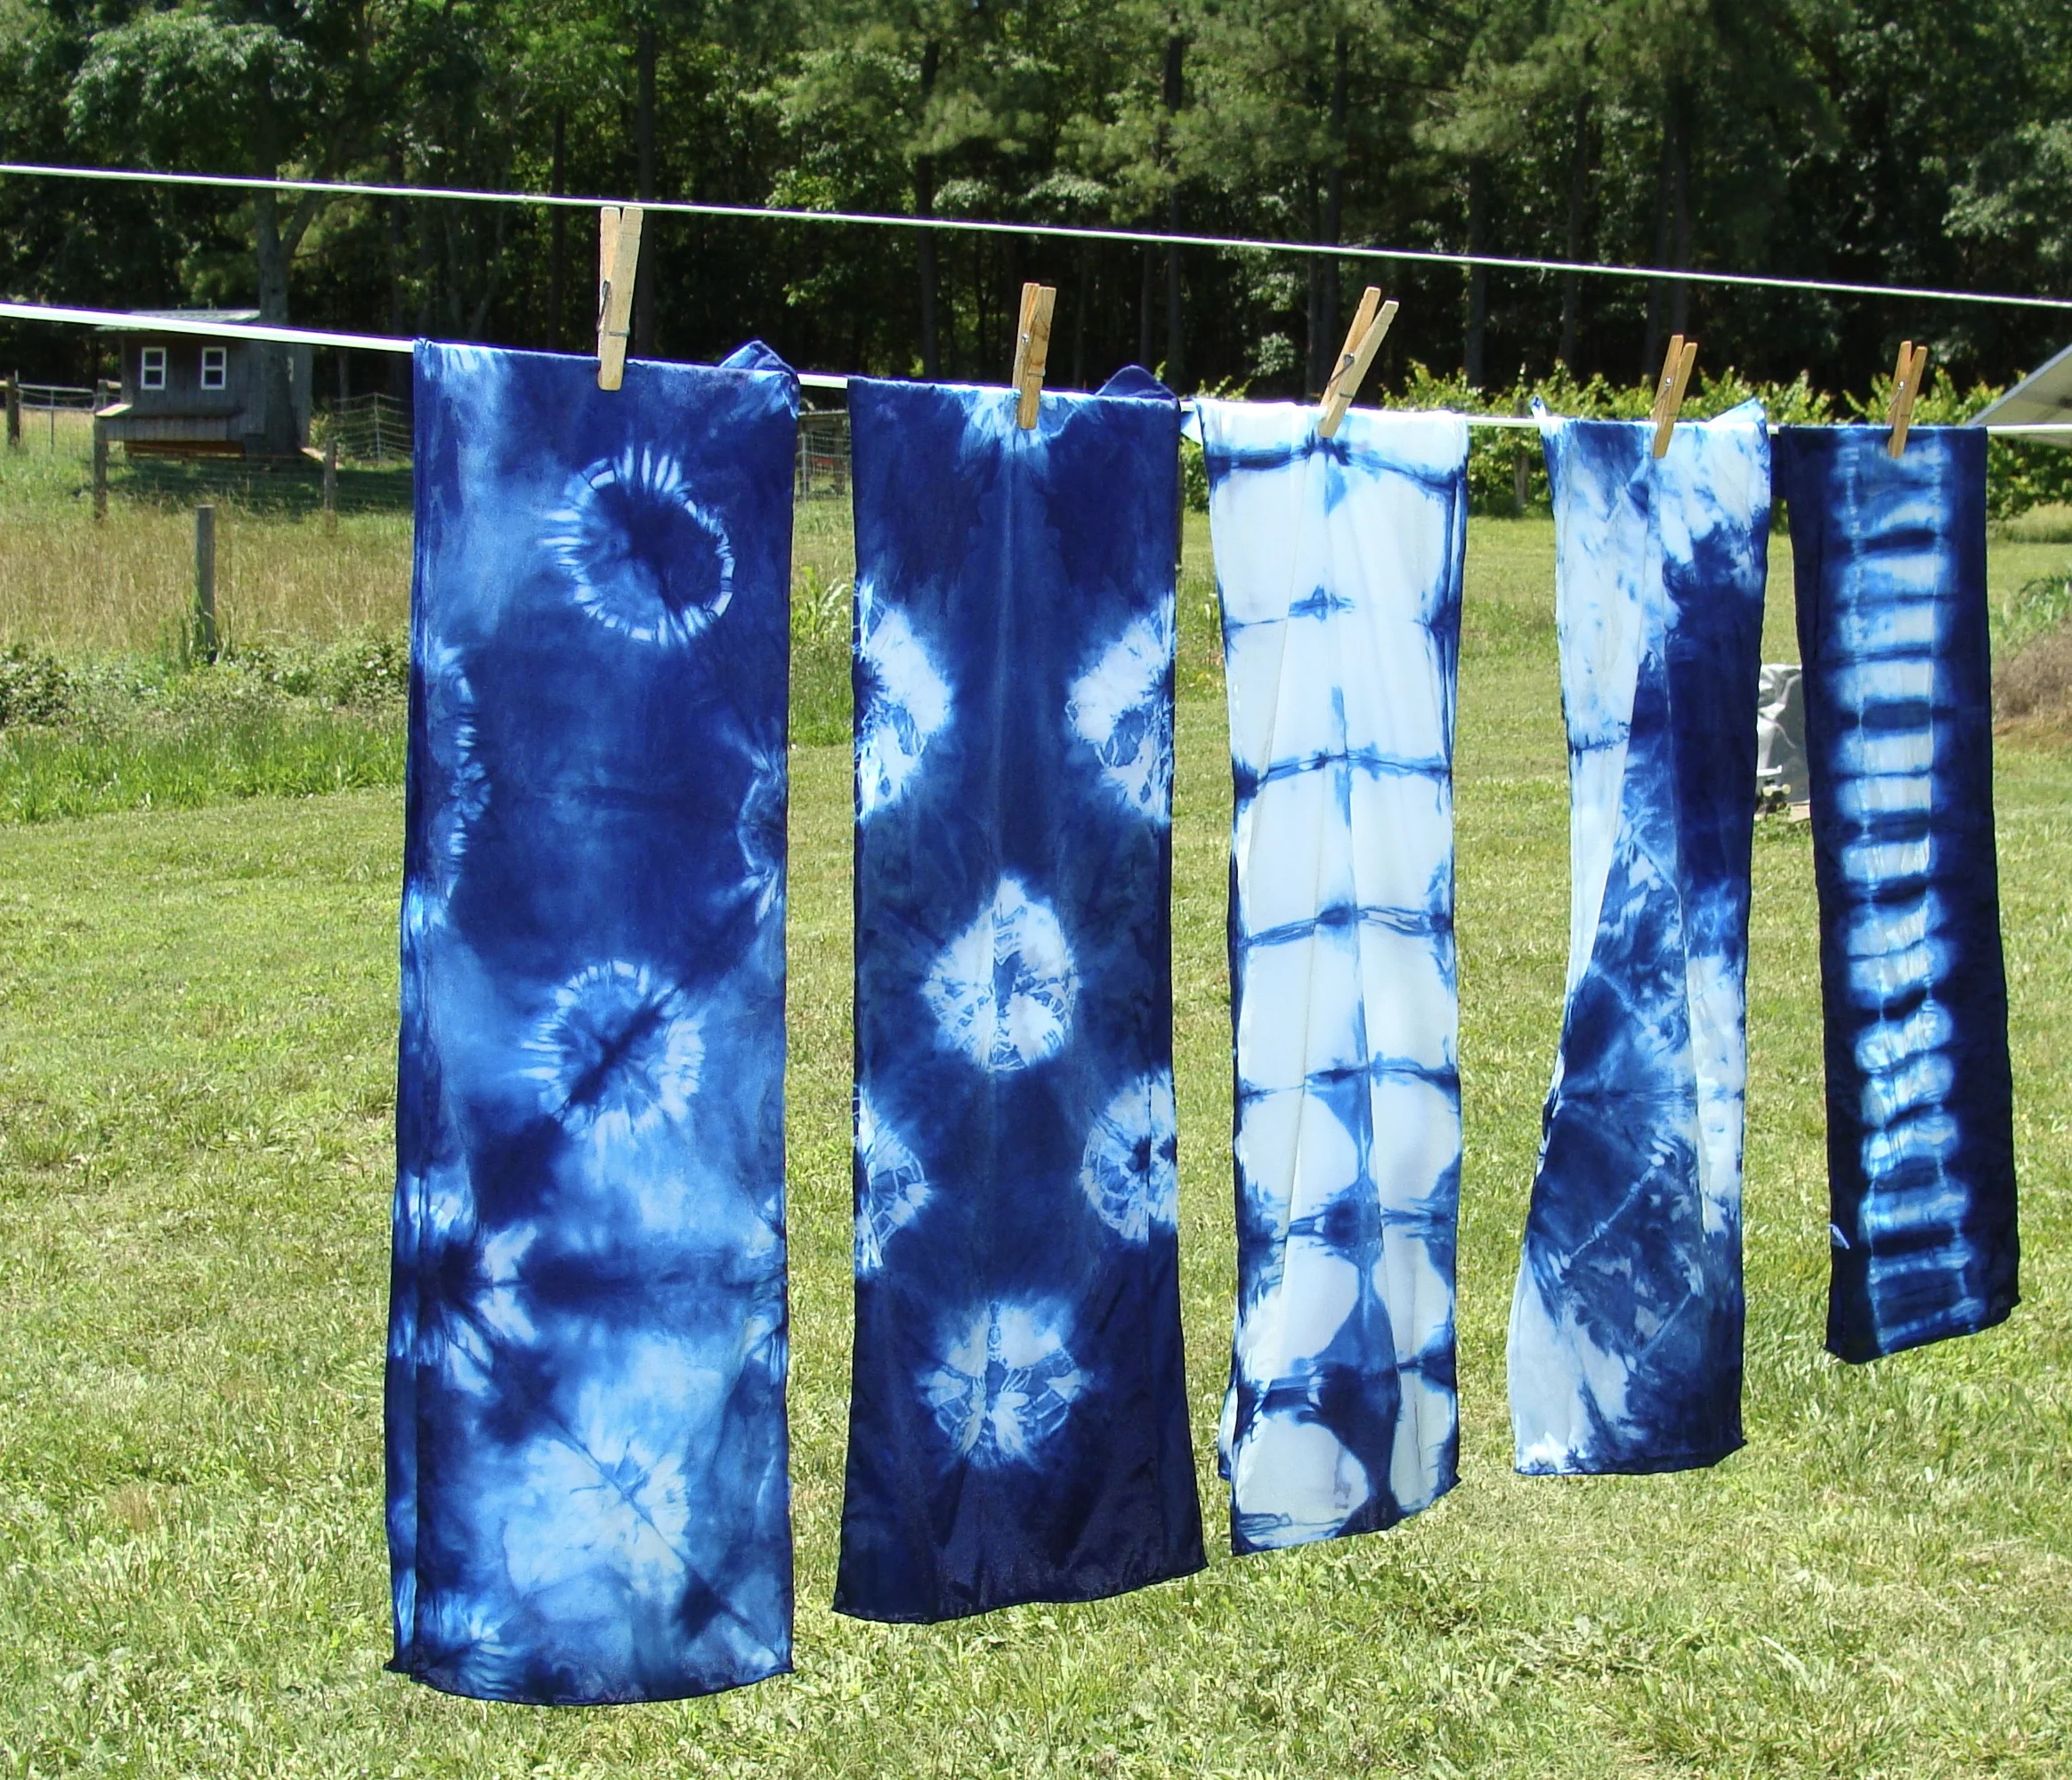
Here’s the really cool part – when you remove your fabric from the indigo dye it will be yellow-green, not blue! Once the fabric is exposed to air for a few minutes, it oxidizes, turning from green to the distinctive indigo blue. You can let it oxidize while it’s still folded, or you can unfold it before it completely oxidizes. I left my cloth folded because it is easier to remove the gathering threads when the fabric is dry.
I rinsed my cloth in cold water, squeezed, and hung to dry. It can take anywhere from a couple of minutes to 20 minutes for your piece to fully oxidize.

When the fabric was dry (ok mostly dry because I couldn't wait!), I removed the supplementary shibori threads to reveal my pattern. You can see in the photos the lovely gradations of color where the dye has penetrated. You never know exactly what result you’ll get, which is part of the fun!
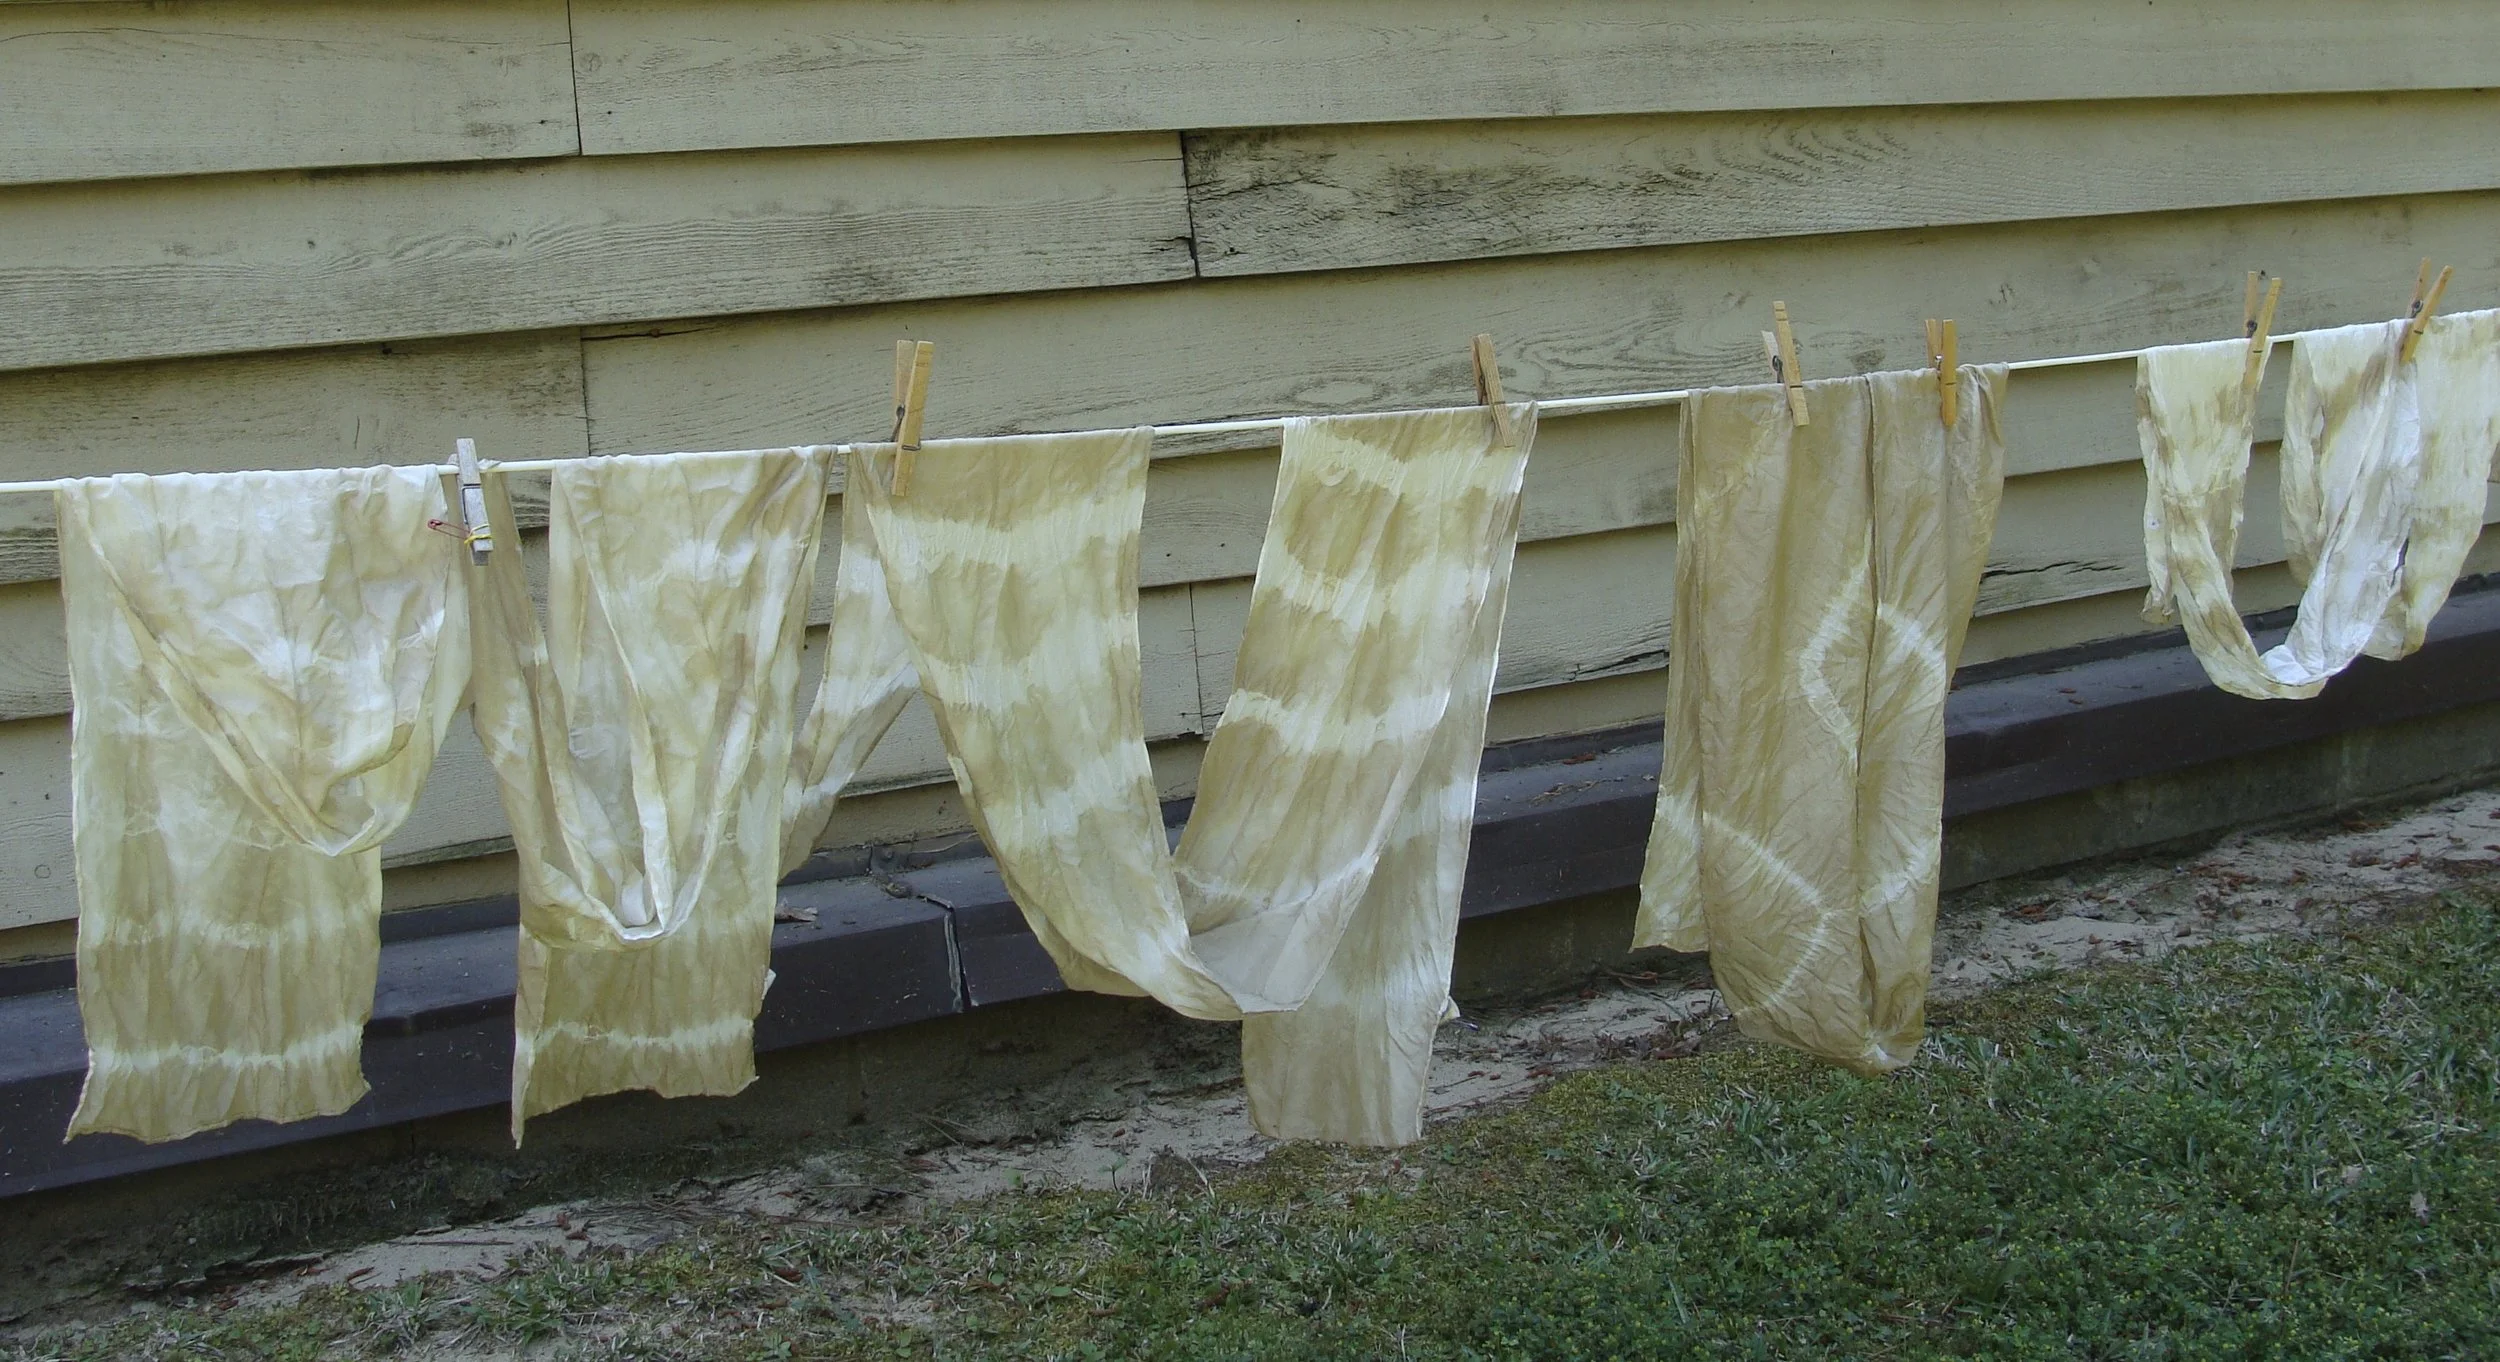
To finish, I washed in hot water in the washing machine, hung to dry on the clothes line, and finally steam pressed.

For the Weaver's - Project Details
Weave Structure: Monk's Belt
Warp: 304 ends 2 1/2 yd long. 16 epi (2/dent in 8 dent reed).
Weft: Ground weft, 14 ppi. Shibori weft, 4 ppi.
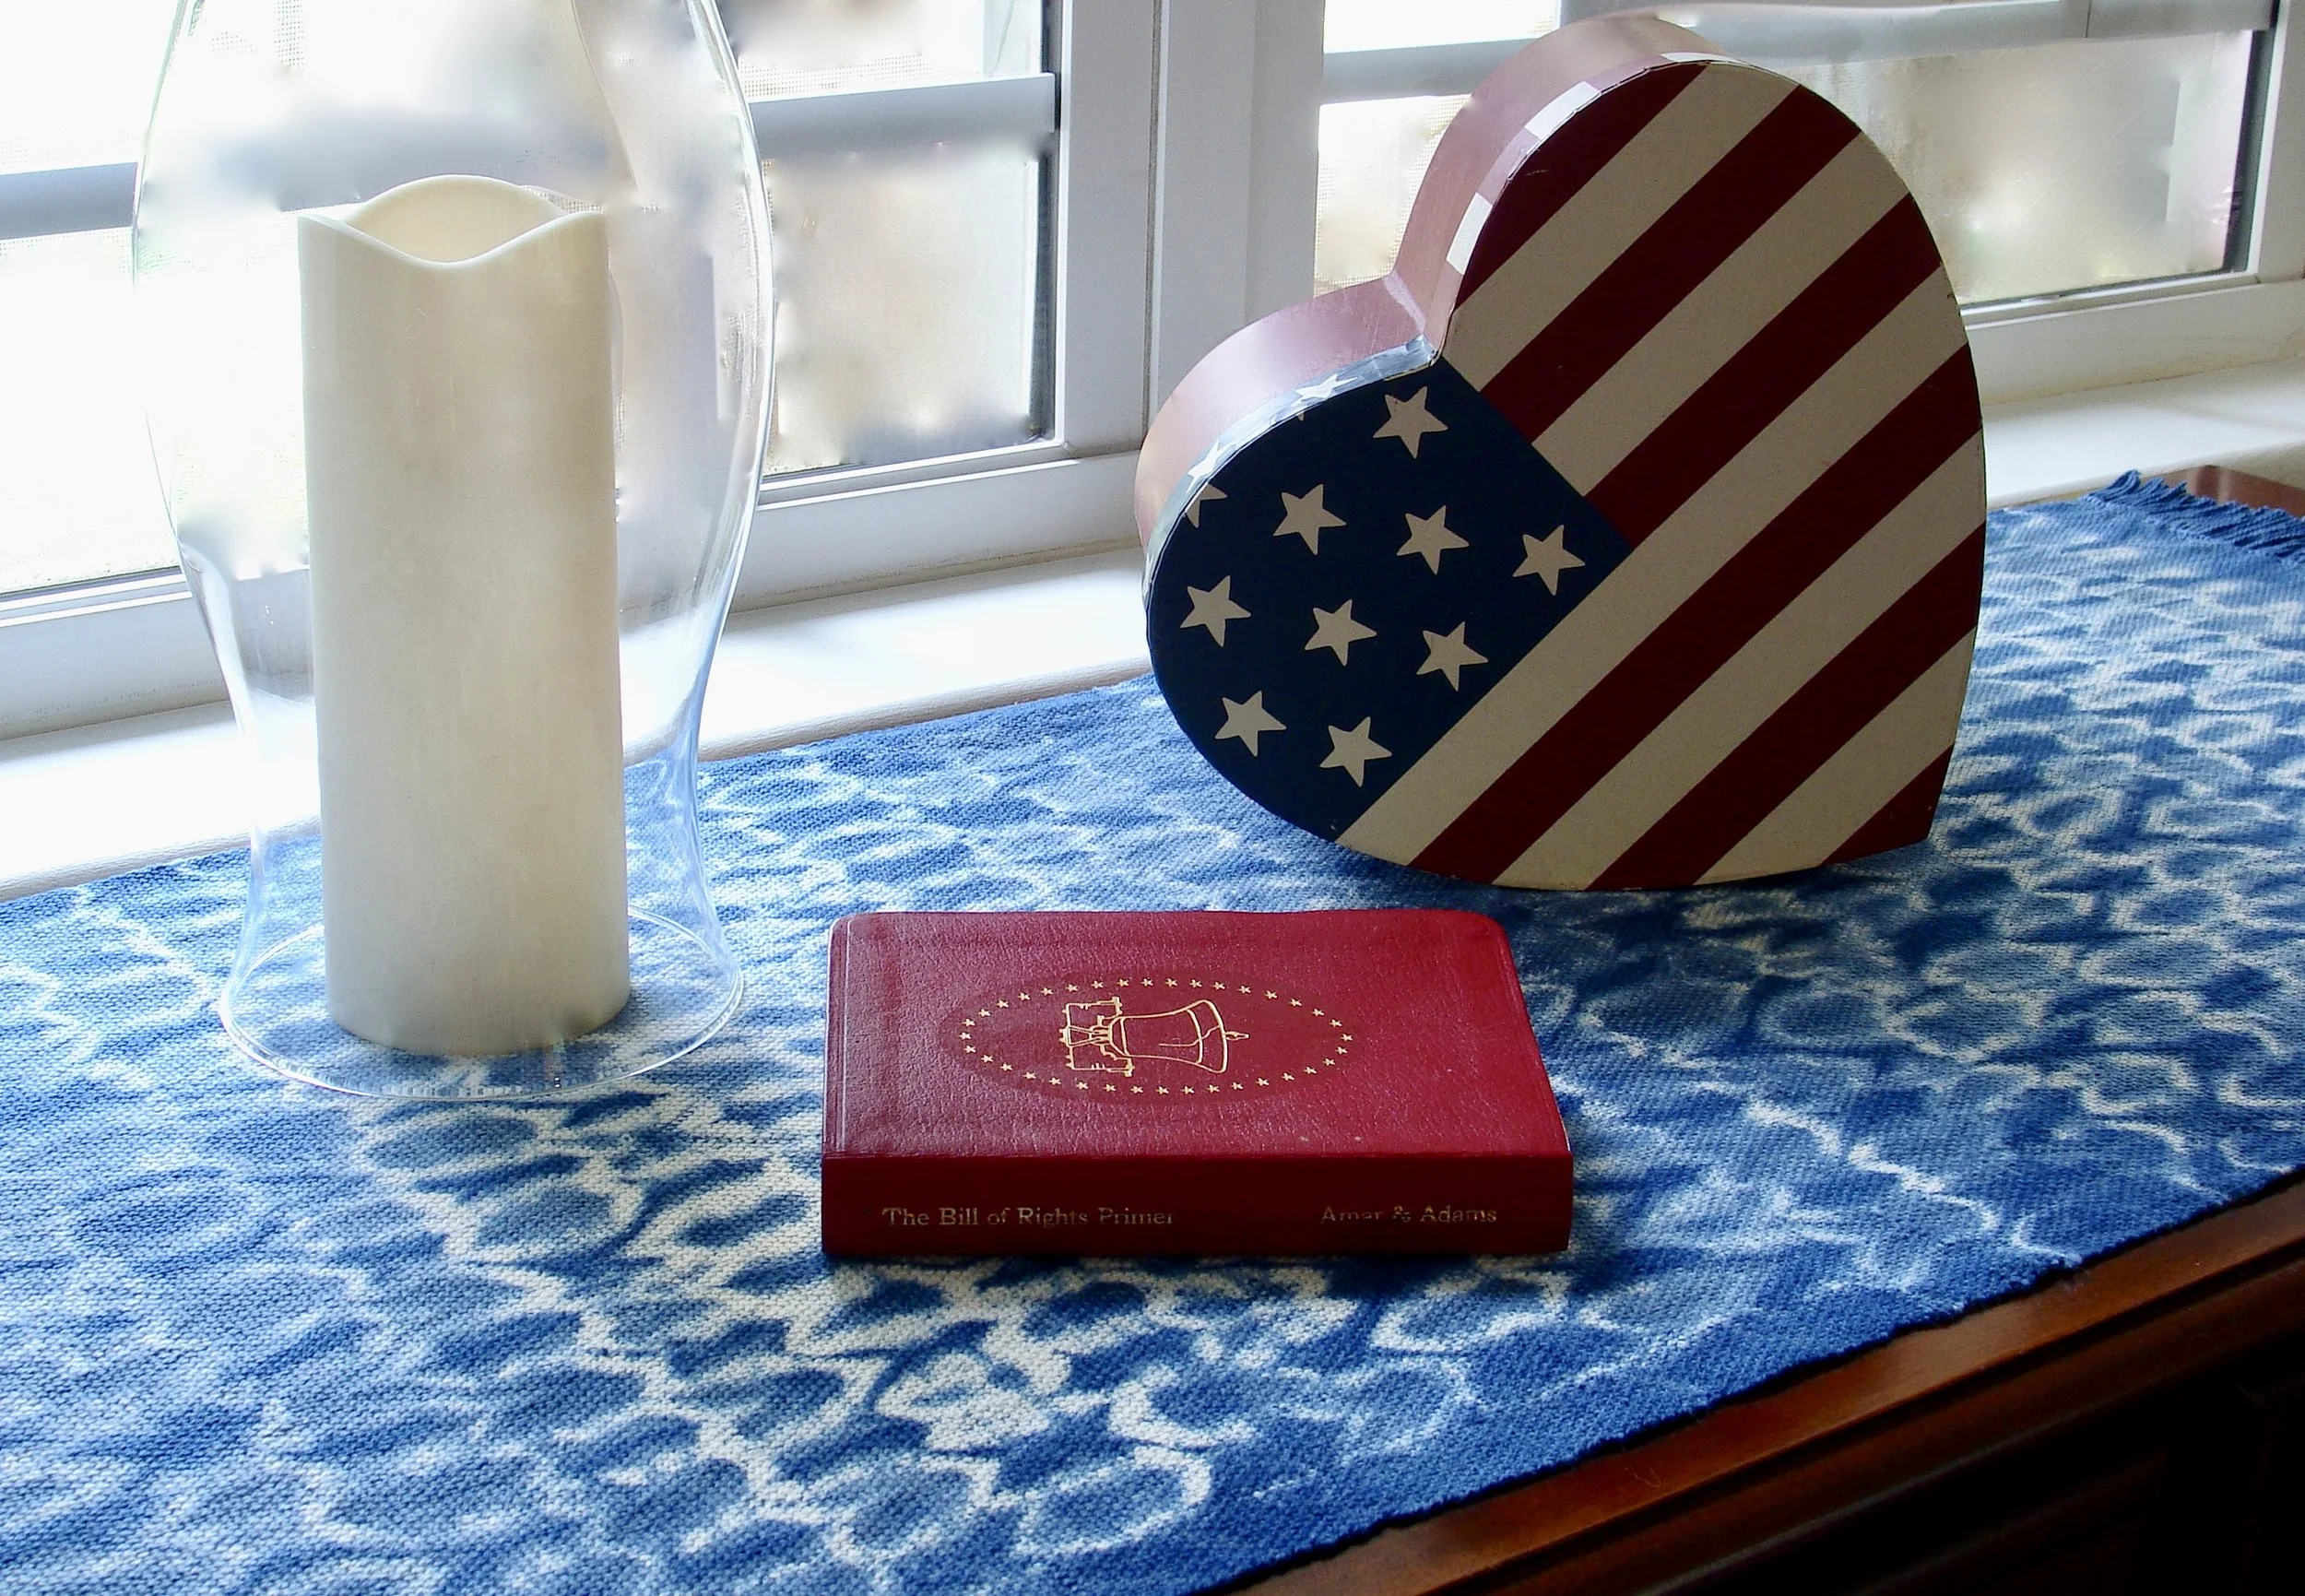
Finished: 17 in x 55 in (includes 2 in fringe on each end)
Fun Project!!!
References
- Woven Shibori by Catharine Ellis
- Indigo, Madder & Marigold by Trudy Van Stralen