Customizing My Spinning Wheel
My first and only spinning wheel is a Louet S-17. As a novice spinner, the reason I chose this particular wheel was I wanted a quality, yet inexpensive basic wheel and the S-17 more than fit that criteria. Yes, there are fancier and prettier wheels, but I love the simplicity of my S-17!
Most spinning wheels have a lacquered finish, while some are intricately carved from beautiful oak and cherry woods. Not my S-17, it's unfinished, laminated hardwood that has been sanded satiny smooth. Now some might find this unattractive, but I see it as a pristine palette calling me to create something uniquely mine. And so that is just what I did.
Here's a little step by step tutorial on how I customized my spinning wheel.
I created a template by tracing around my wheel onto freezer paper. The freezer paper was a tiny bit too small, but was certainly sufficient for trying out ideas. I had already settled on flowers and colors that would mimic my Flora & Fiber logo. My freehand drawing/ painting skills are too rudimentary for this project, so I chose some stencils I had in my stash - likely purchased from a craft store clearance bin. I tried a variety of ideas and placements, settling on repeating the floral motif around the outside edge and a central pattern that I thought would look interesting in motion while the wheel is spinning.
Supplies:
- Stencils - 2-step floral design, medallion mask
- "Paint" - Ranger Distress Ink - Peeled Paint, Broken China, Black Soot, Mowed Lawn, Chipped Sapphire (last two not pictured)
- Craft Sponges
- Painters' Tape
- Protractor (downloaded and printed )
- Ruler
- Pencil
The wheel was very easy to remove from the back post, just a matter of 2 bolts. If you are not sure how to do it, I recommend referring to your assembly instructions. It was not hard.
I wanted my floral motif to repeat six times evenly around the border of my wheel; that would mean every 60 degrees (circle is 360 degrees). I found a protractor online, downloaded it (see link above), and printed it. Then, using the ruler and the central hole already drilled in the wheel, I made a faint pencil mark every 60 degrees at the wheels edge.
I chose to use Ranger Distress Ink for my stenciling as I had the inks on hand and in the colors I wanted to use. Distress inks are water-based dye inks that are fade resistant. I have had good results with these inks in the past, although I never tried them on wood before but I know others do. Acrylic paints are also commonly used when decorating spinning wheels.
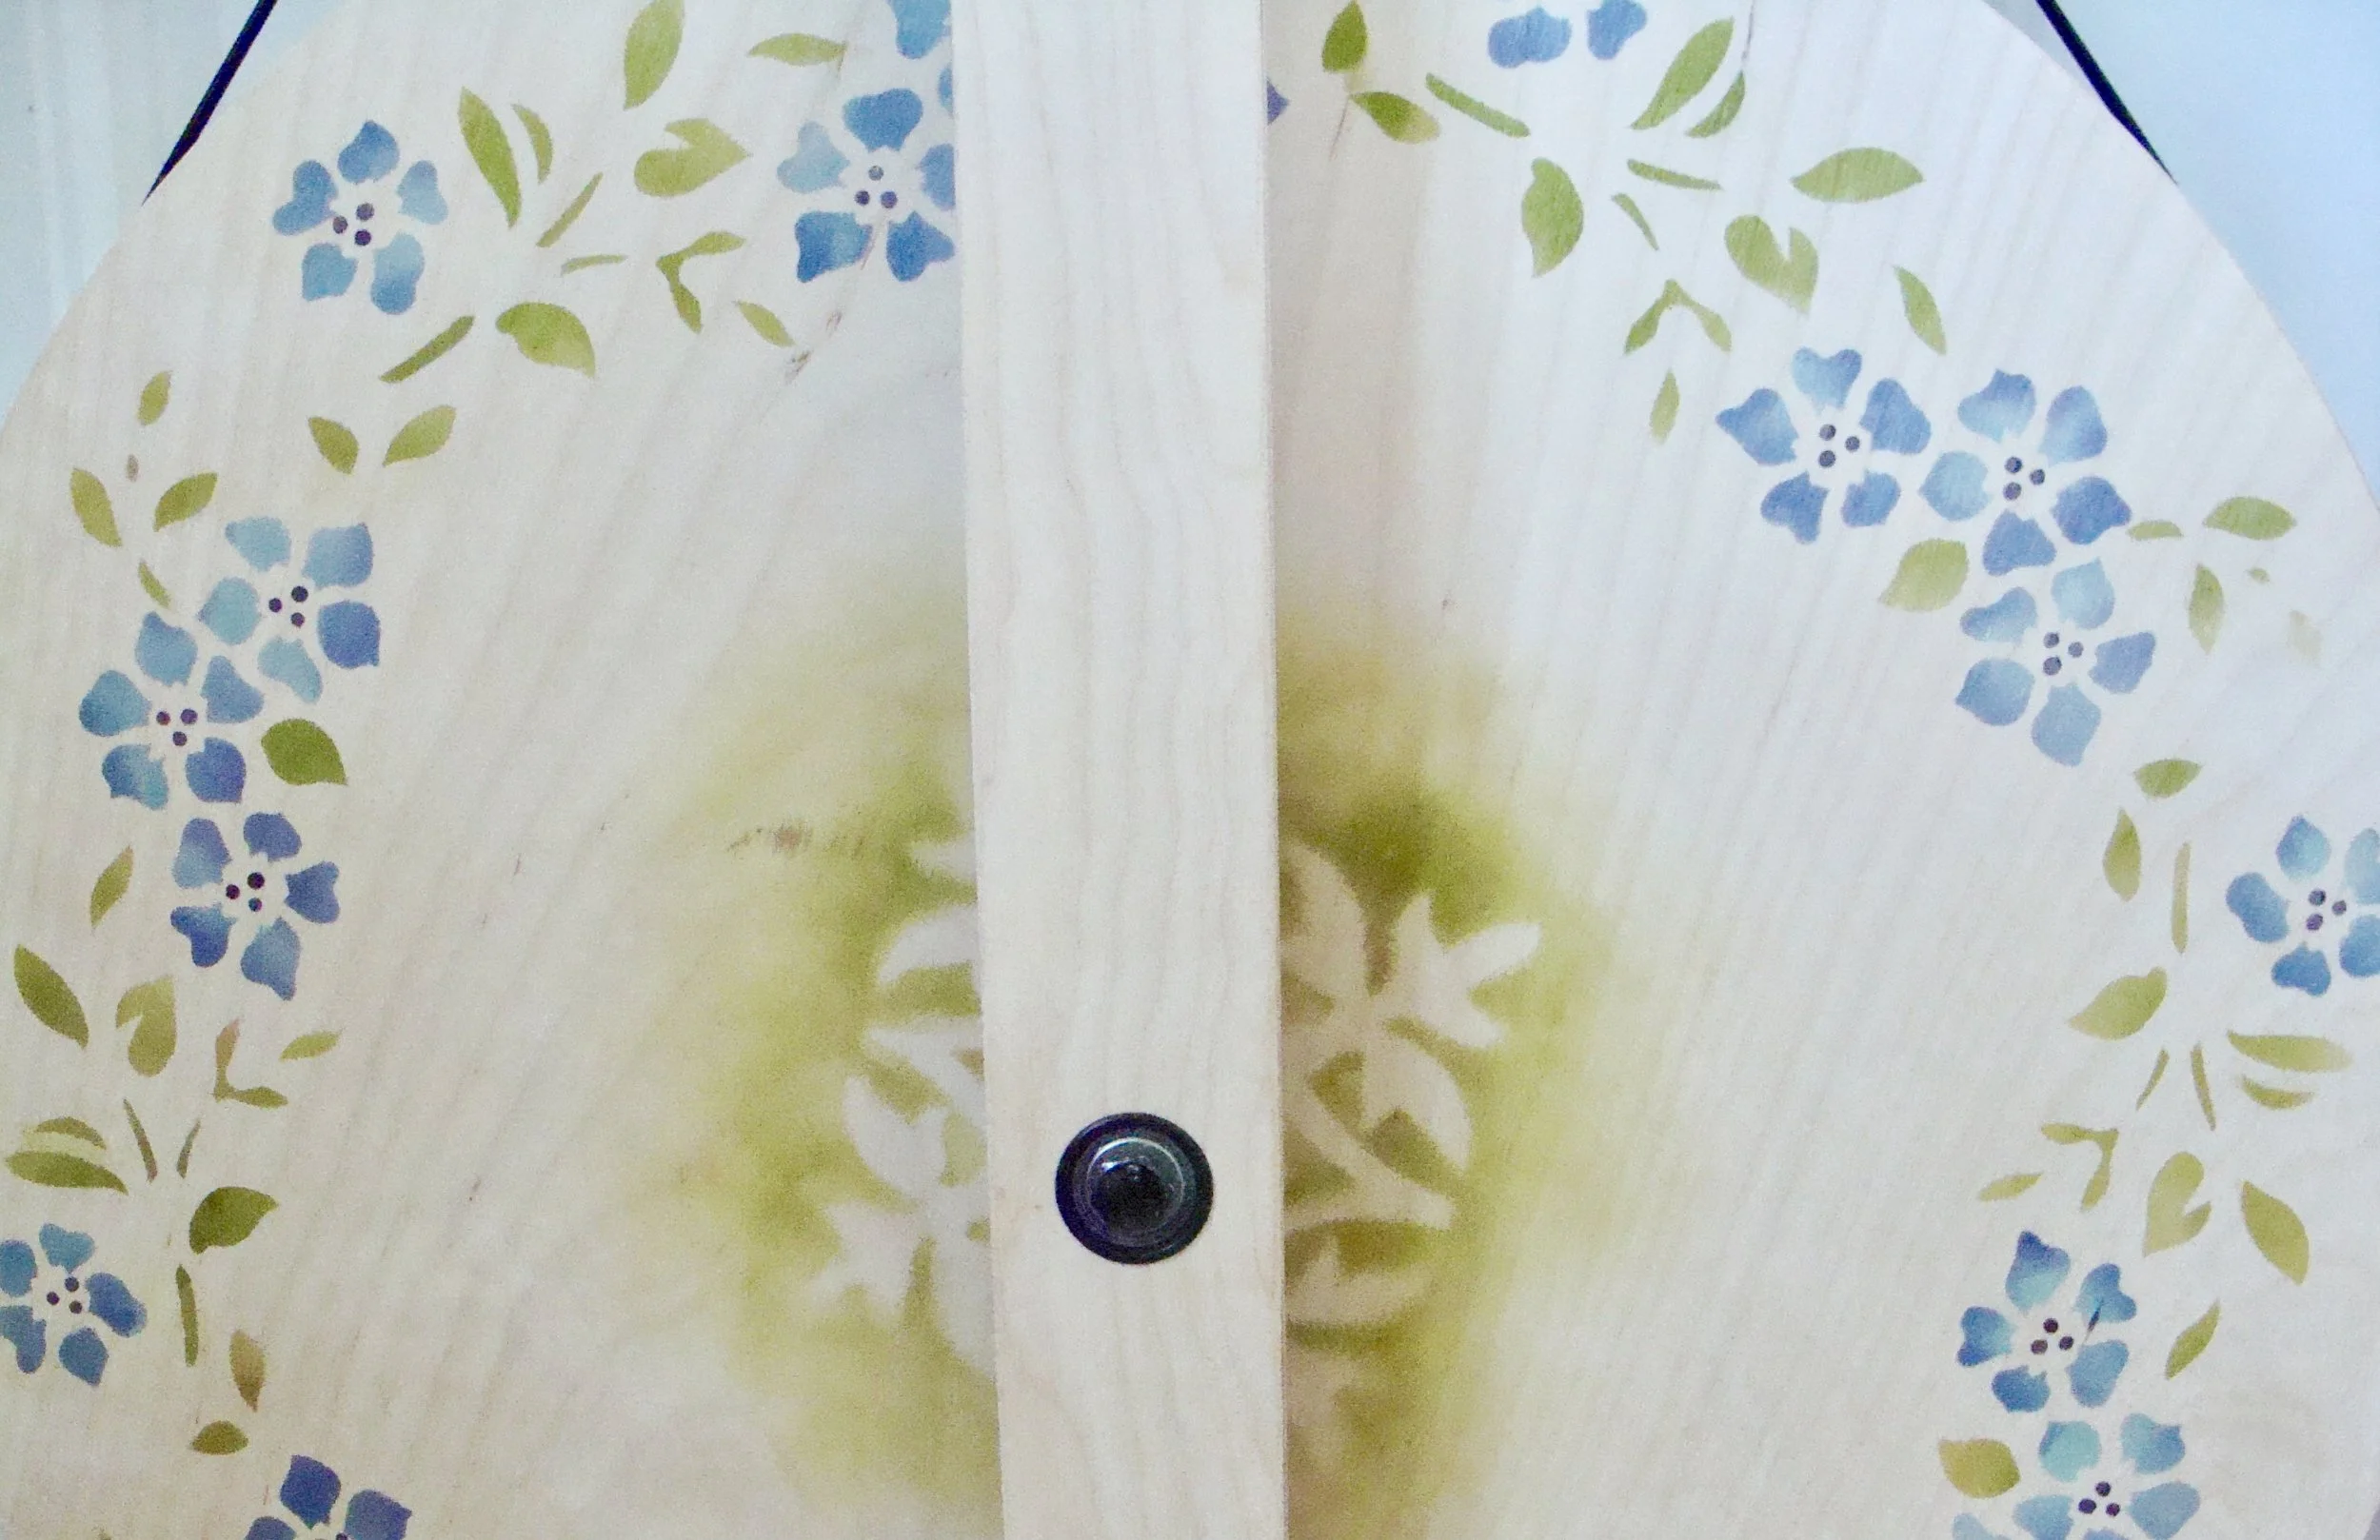
The first stencil is the leaves. I carefully placed it within my pencil marks and measured making sure the stencil edges were even with the wheel edge. Using a craft sponge, I stenciled with Peeled Paint ink, then highlighted with the Mowed Lawn ink to give some dimension.
By the time I got around the wheel, the first group of leaves were dry. Using the second stencil, I added the flowers, first with Broken China ink and then highlighting with Chipped Sapphire ink. Most quality 2-step stencils have lines that make it easy to align the second stencil.
The stencil also had 3 little dots for the flower centers. I used Black Soot ink for these.
I used a mask rather than a stencil to add a medallion design in the center. Again, I sponged with Peeled Paint ink. This actually looks more subdued and prettier in real life.
I chose not to apply a sealant because the ink should be permanent once dry. Also, the wheel is not something that will be washed frequently nor exposed to weather.
A couple tips to consider. I wiped the back of the stencil off each time I moved it so as not to smear any residual ink. Should you have a smear or stray ink mark, wipe it off immediately with a wet paper towel; an advantage of water-based inks.
I'm pleased with the result! My humble S-17 wheel is now a personalized one of a kind!
If you already own or want to purchase a Louet S-17 Spinning Wheel, why don't you try your hand at customizing it? Louet currently has a special offer. If you share a picture of your painted S-17 wheel, Louet will send you $200 worth of fiber! Wow! Click here for the details.
