Let's Dye . . . Black Walnut
I haven't written about dyeing (note 'dyeing', not 'dying') in awhile. Now with Autumn fast approaching, I've noticed the Black Walnuts are starting to drop, prompting me to sit down and compose this post.
Black Walnut tree in background
Black Walnut Juglans nigra is a large, upright-spreading tree with stout branches growing 50 to 75 feet; in some instances, up to 100 feet tall. The leaves are deciduous, dark yellow-green, averaging 2 to 5 inches long, and turning yellow in the fall. The bark is dark gray to brown, sometimes almost black, and deeply furrowed. Black Walnut is native to hardwood forests of eastern North America, but the trees often grow around old homesites where they were once planted. We are fortunate to have one of those large Black Walnut that provides wonderful shade to our porch and summer kitchen here at Green Pastures Farm.
Master Gardener Tip
Other plants often do not survive within the root zone of large walnut trees because of the roots' production of juglone, a compound that inhibits growth or kills the roots of neighboring plants.
Black Walnut are not only aesthetically pleasing, but are also valued for their functional purposes. It is one of the most valuable trees in North America because of its strong, durable, richly grained wood used for furniture, veneers, and cabinetmaking. The fruit is edible. The bark is used in tanning.
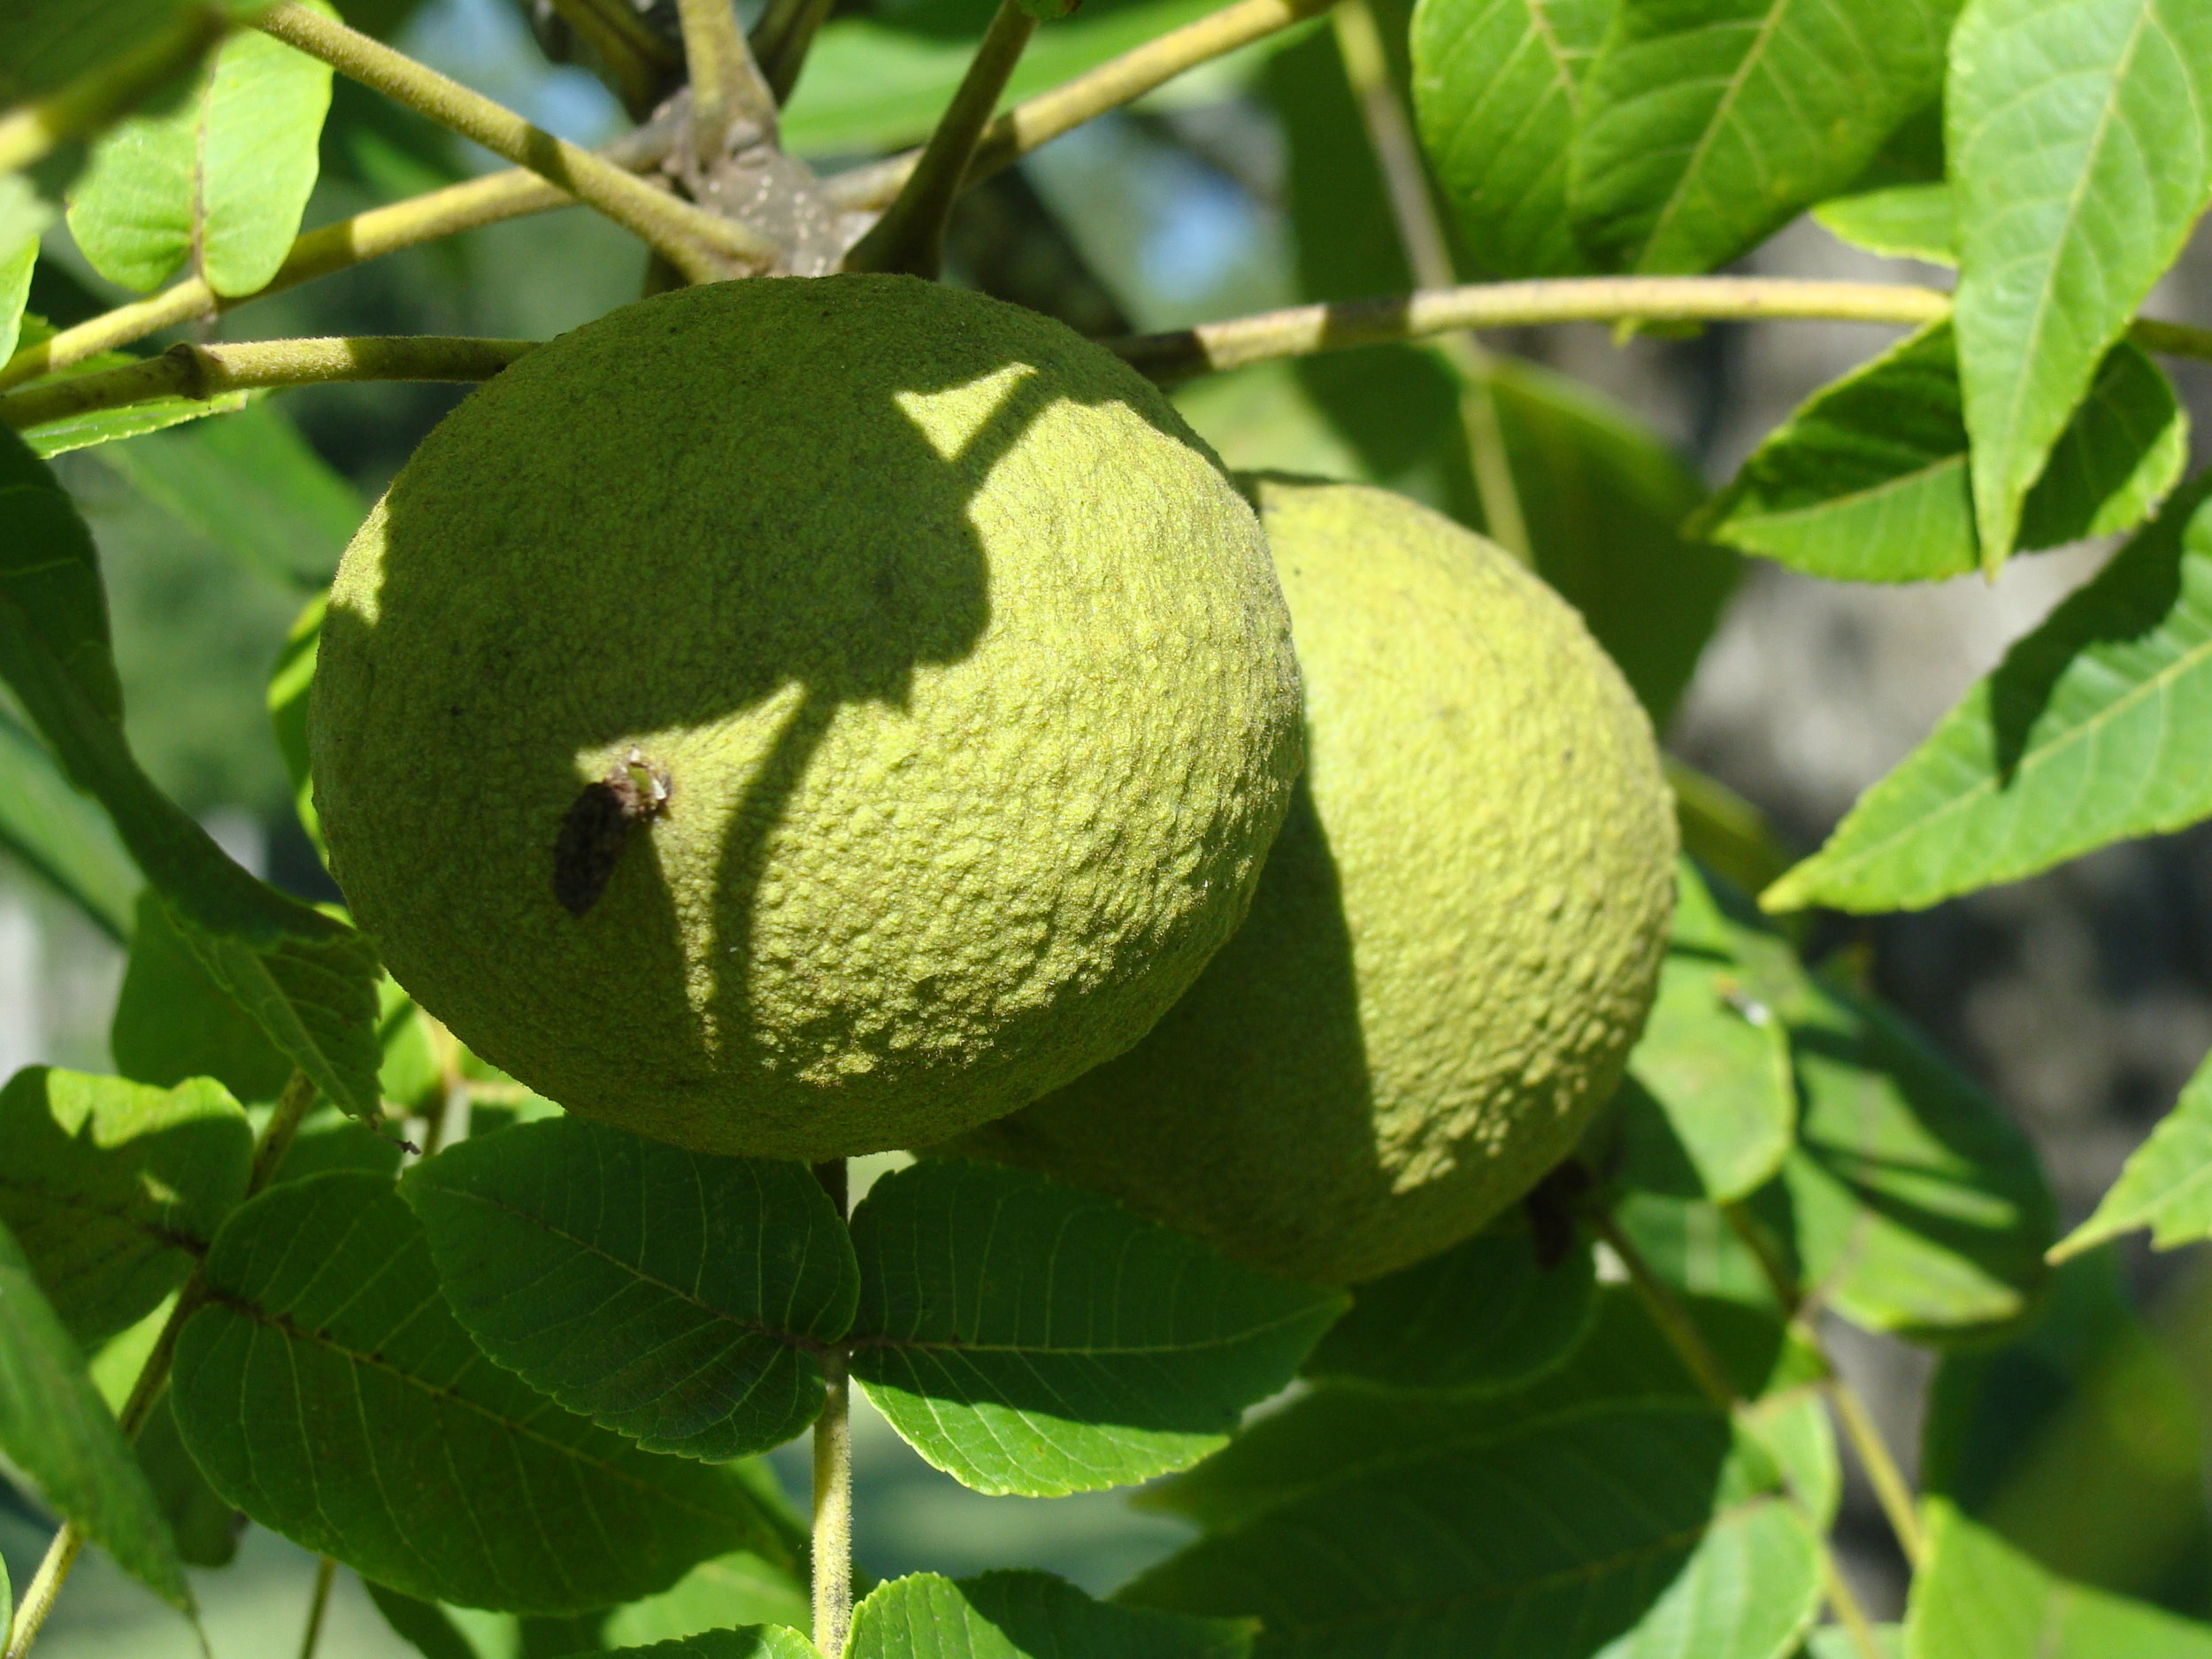
Black Walnuts at Green Pastures Farm
However, it is the fluorescent green, 2 inch diameter, rounded fruit that are of interest to the natural dyer. These little "dye balls" cascade to the ground seemingly unending in late summer and fall. The dye is in the yellowish green outer hulls (husks) that surround the fruit (nut). The colorant is juglone (yep, that same compound that inhibits growth of other plants). Black Walnut is a direct or substantive dye, which means that no mordant is necessary when used for dyeing protein (animal) fibers or fabric. There are some tannins in the hull, but that is considered secondary to the strong juglone.
Terminology
Mordant - a substance that has an affinity with both the materials to be dyed and the natural plant dyestuff. It acts as a bond between the two, helping the dye to become permanently fixed to the fibers. Examples: alum, tannin
Direct (substantive) dyes - natural dyestuff that can be fixed to the fibers without the assistance of any other substances. Example: black walnut, coffee, tumeric
Adjective dyes - need a mordant for the colors to develop fully and fix permanently. Most natural dyes fall into this type.
Vat dyes - also a substantive dye, however they need other treatments for the dye material to be soluble. Example: indigo
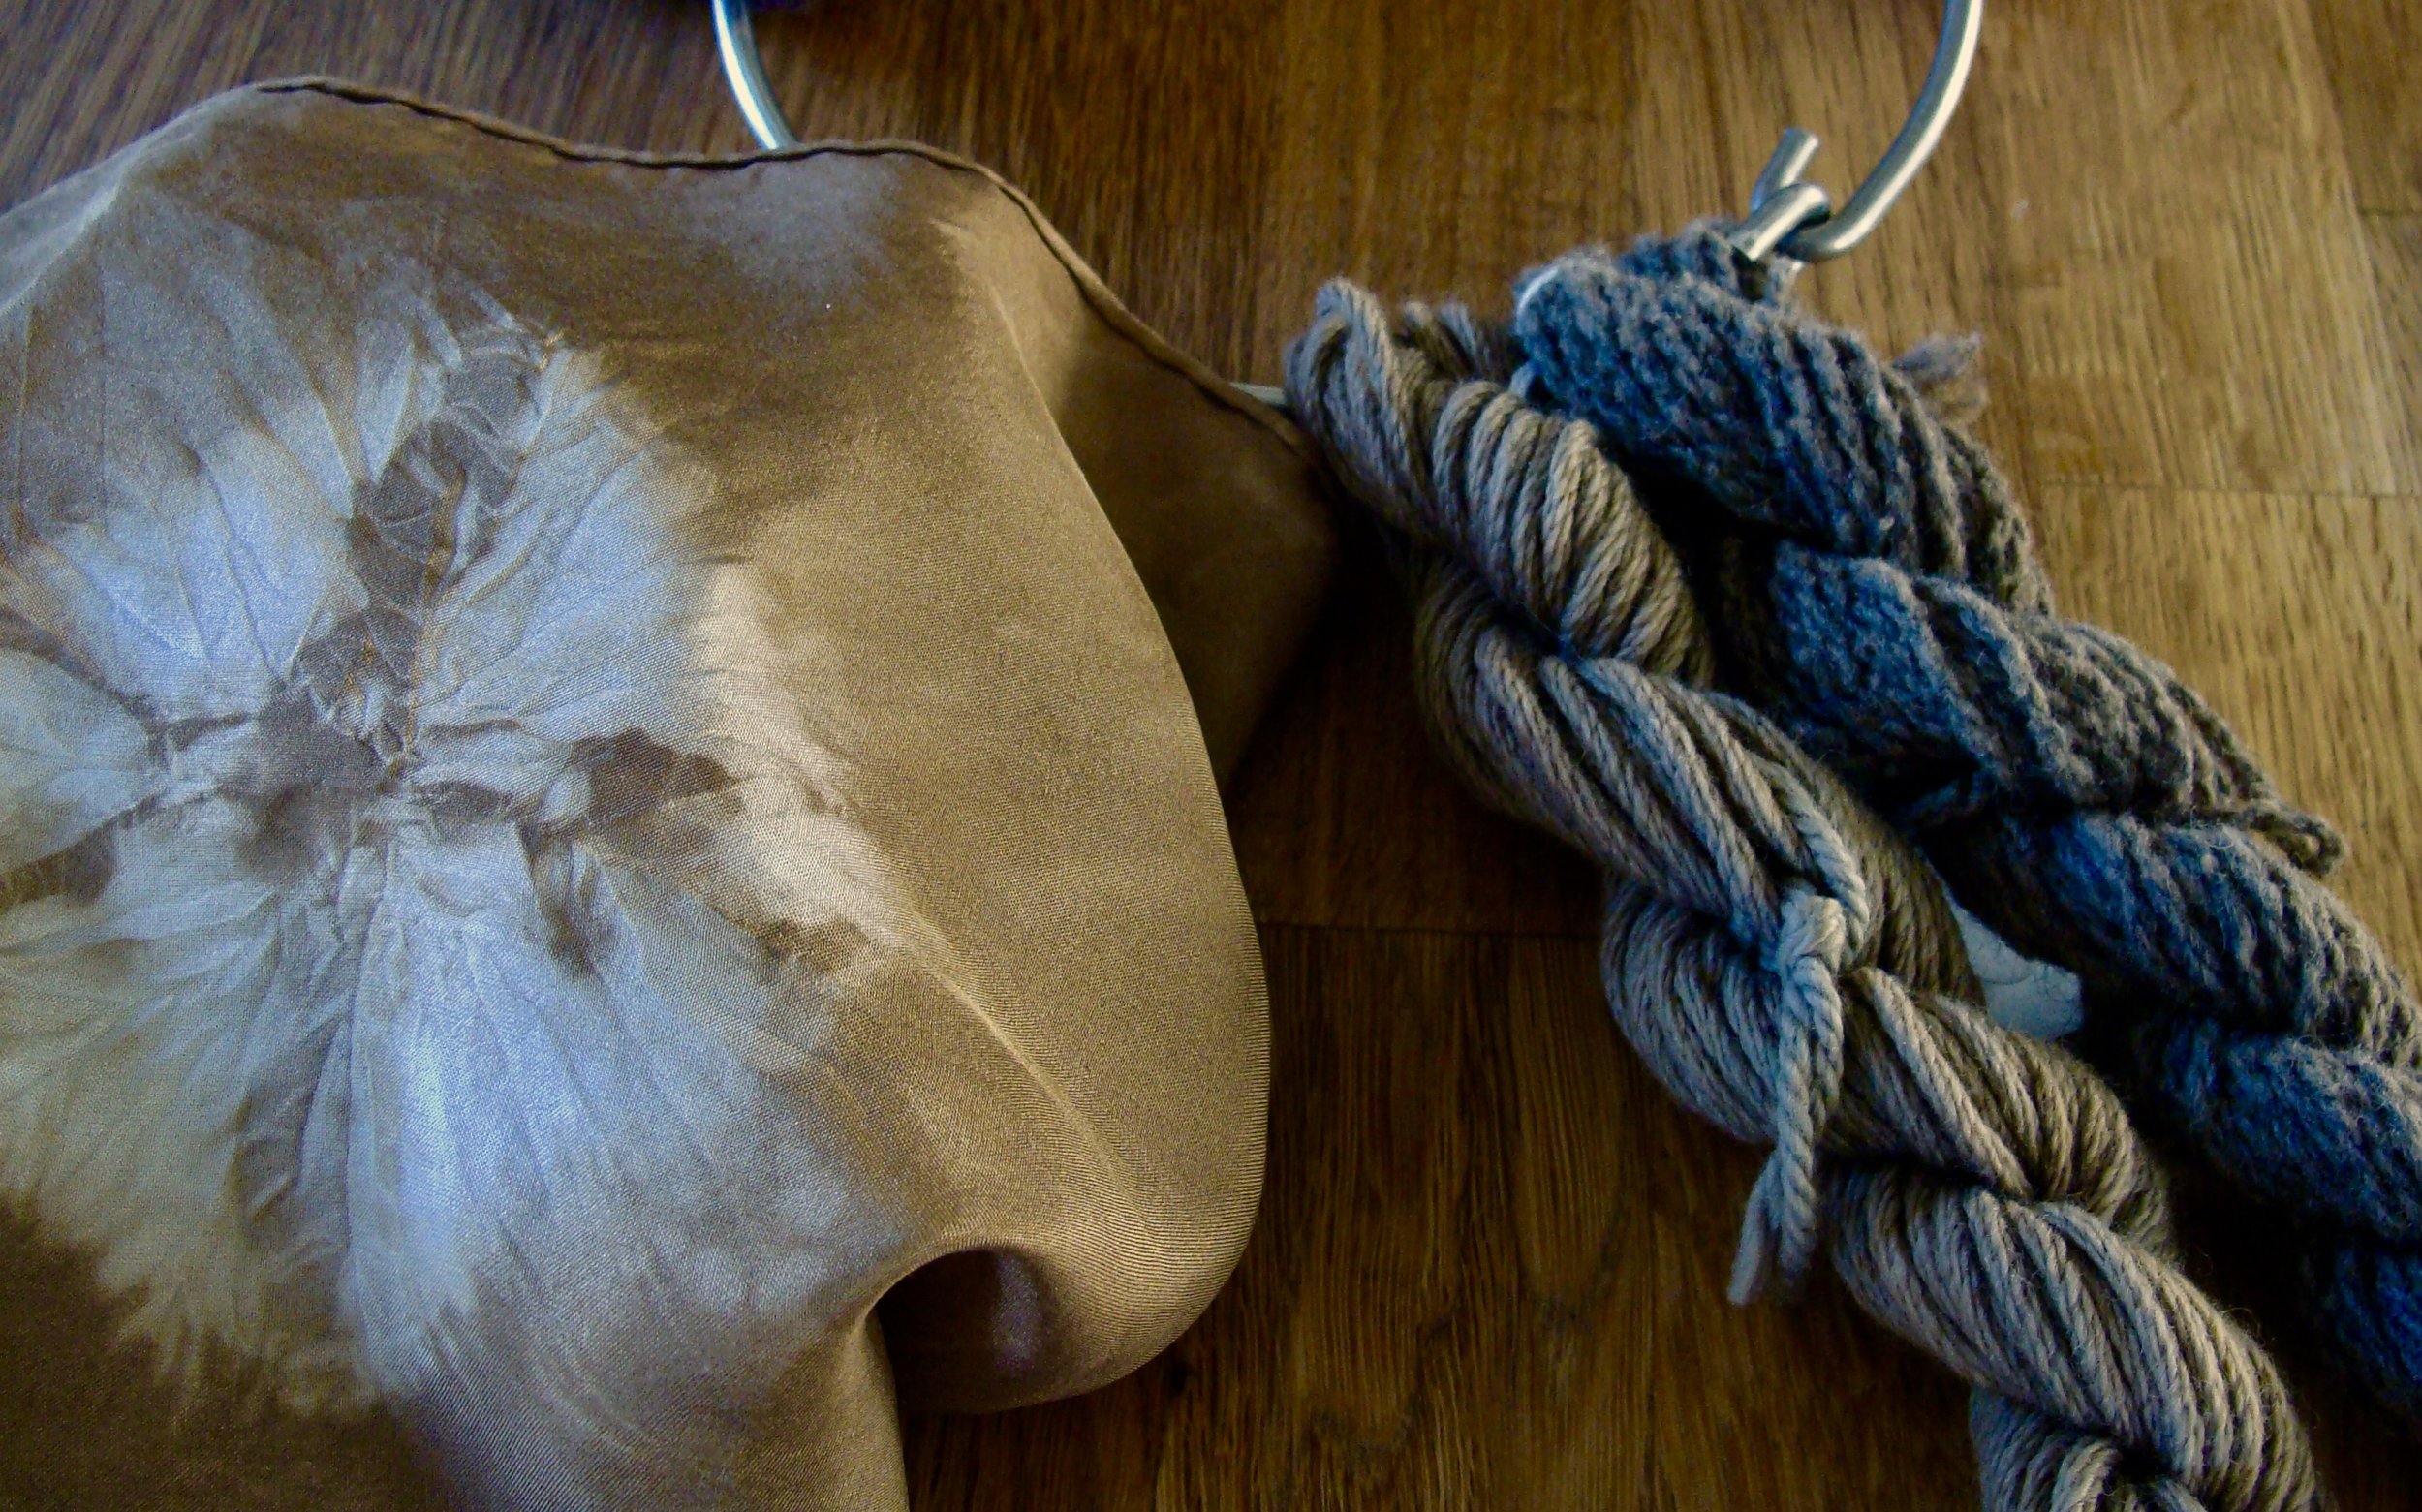
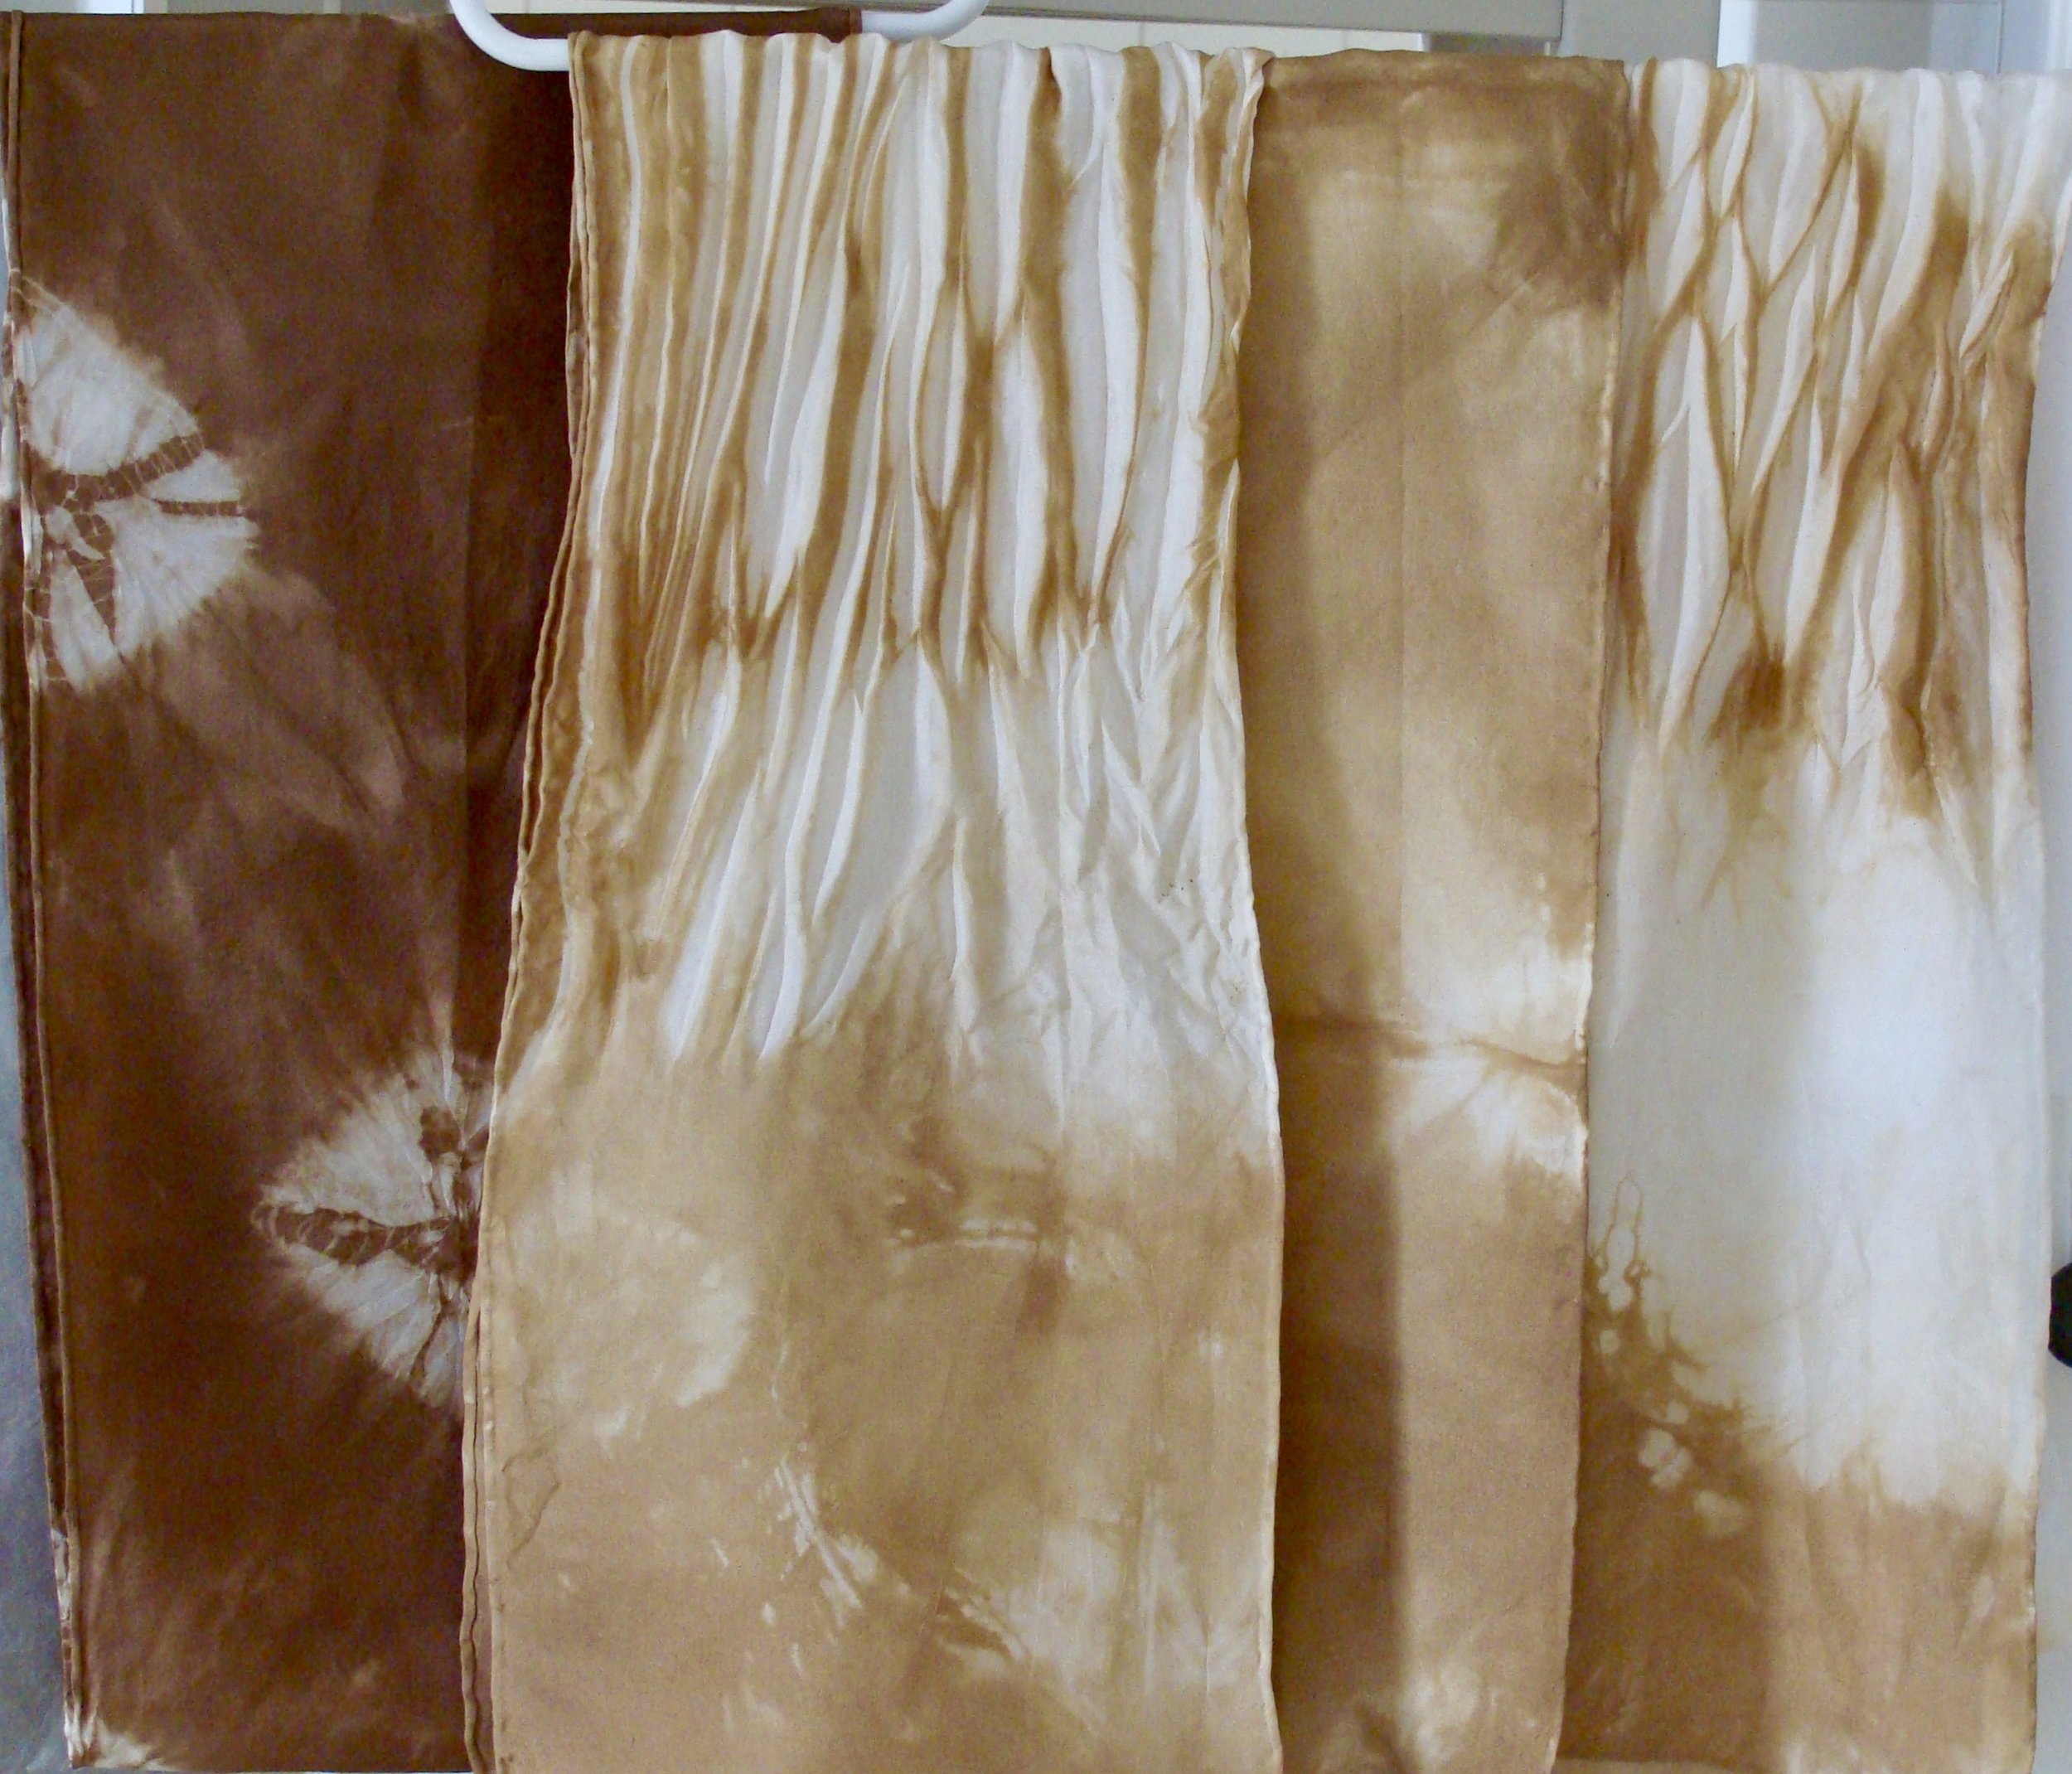
(left to right) - black walnut on silk, black walnut + iron on white merino wool, black walnut + iron on gray rambouillet/alpaca blend
Black Walnut dyes in rich browns or tans on protein (animal) fibers. Cellulose (plant) fibers may be dyed as well, but probably will require a mordant in order to be colorfast. Walnut also mixes well with other dyes to produce a wider range of colors. The color can be dulled and deepened with an afterbath of iron (see above). A near black can be achieved when overdyeing indigo on wool or silk.
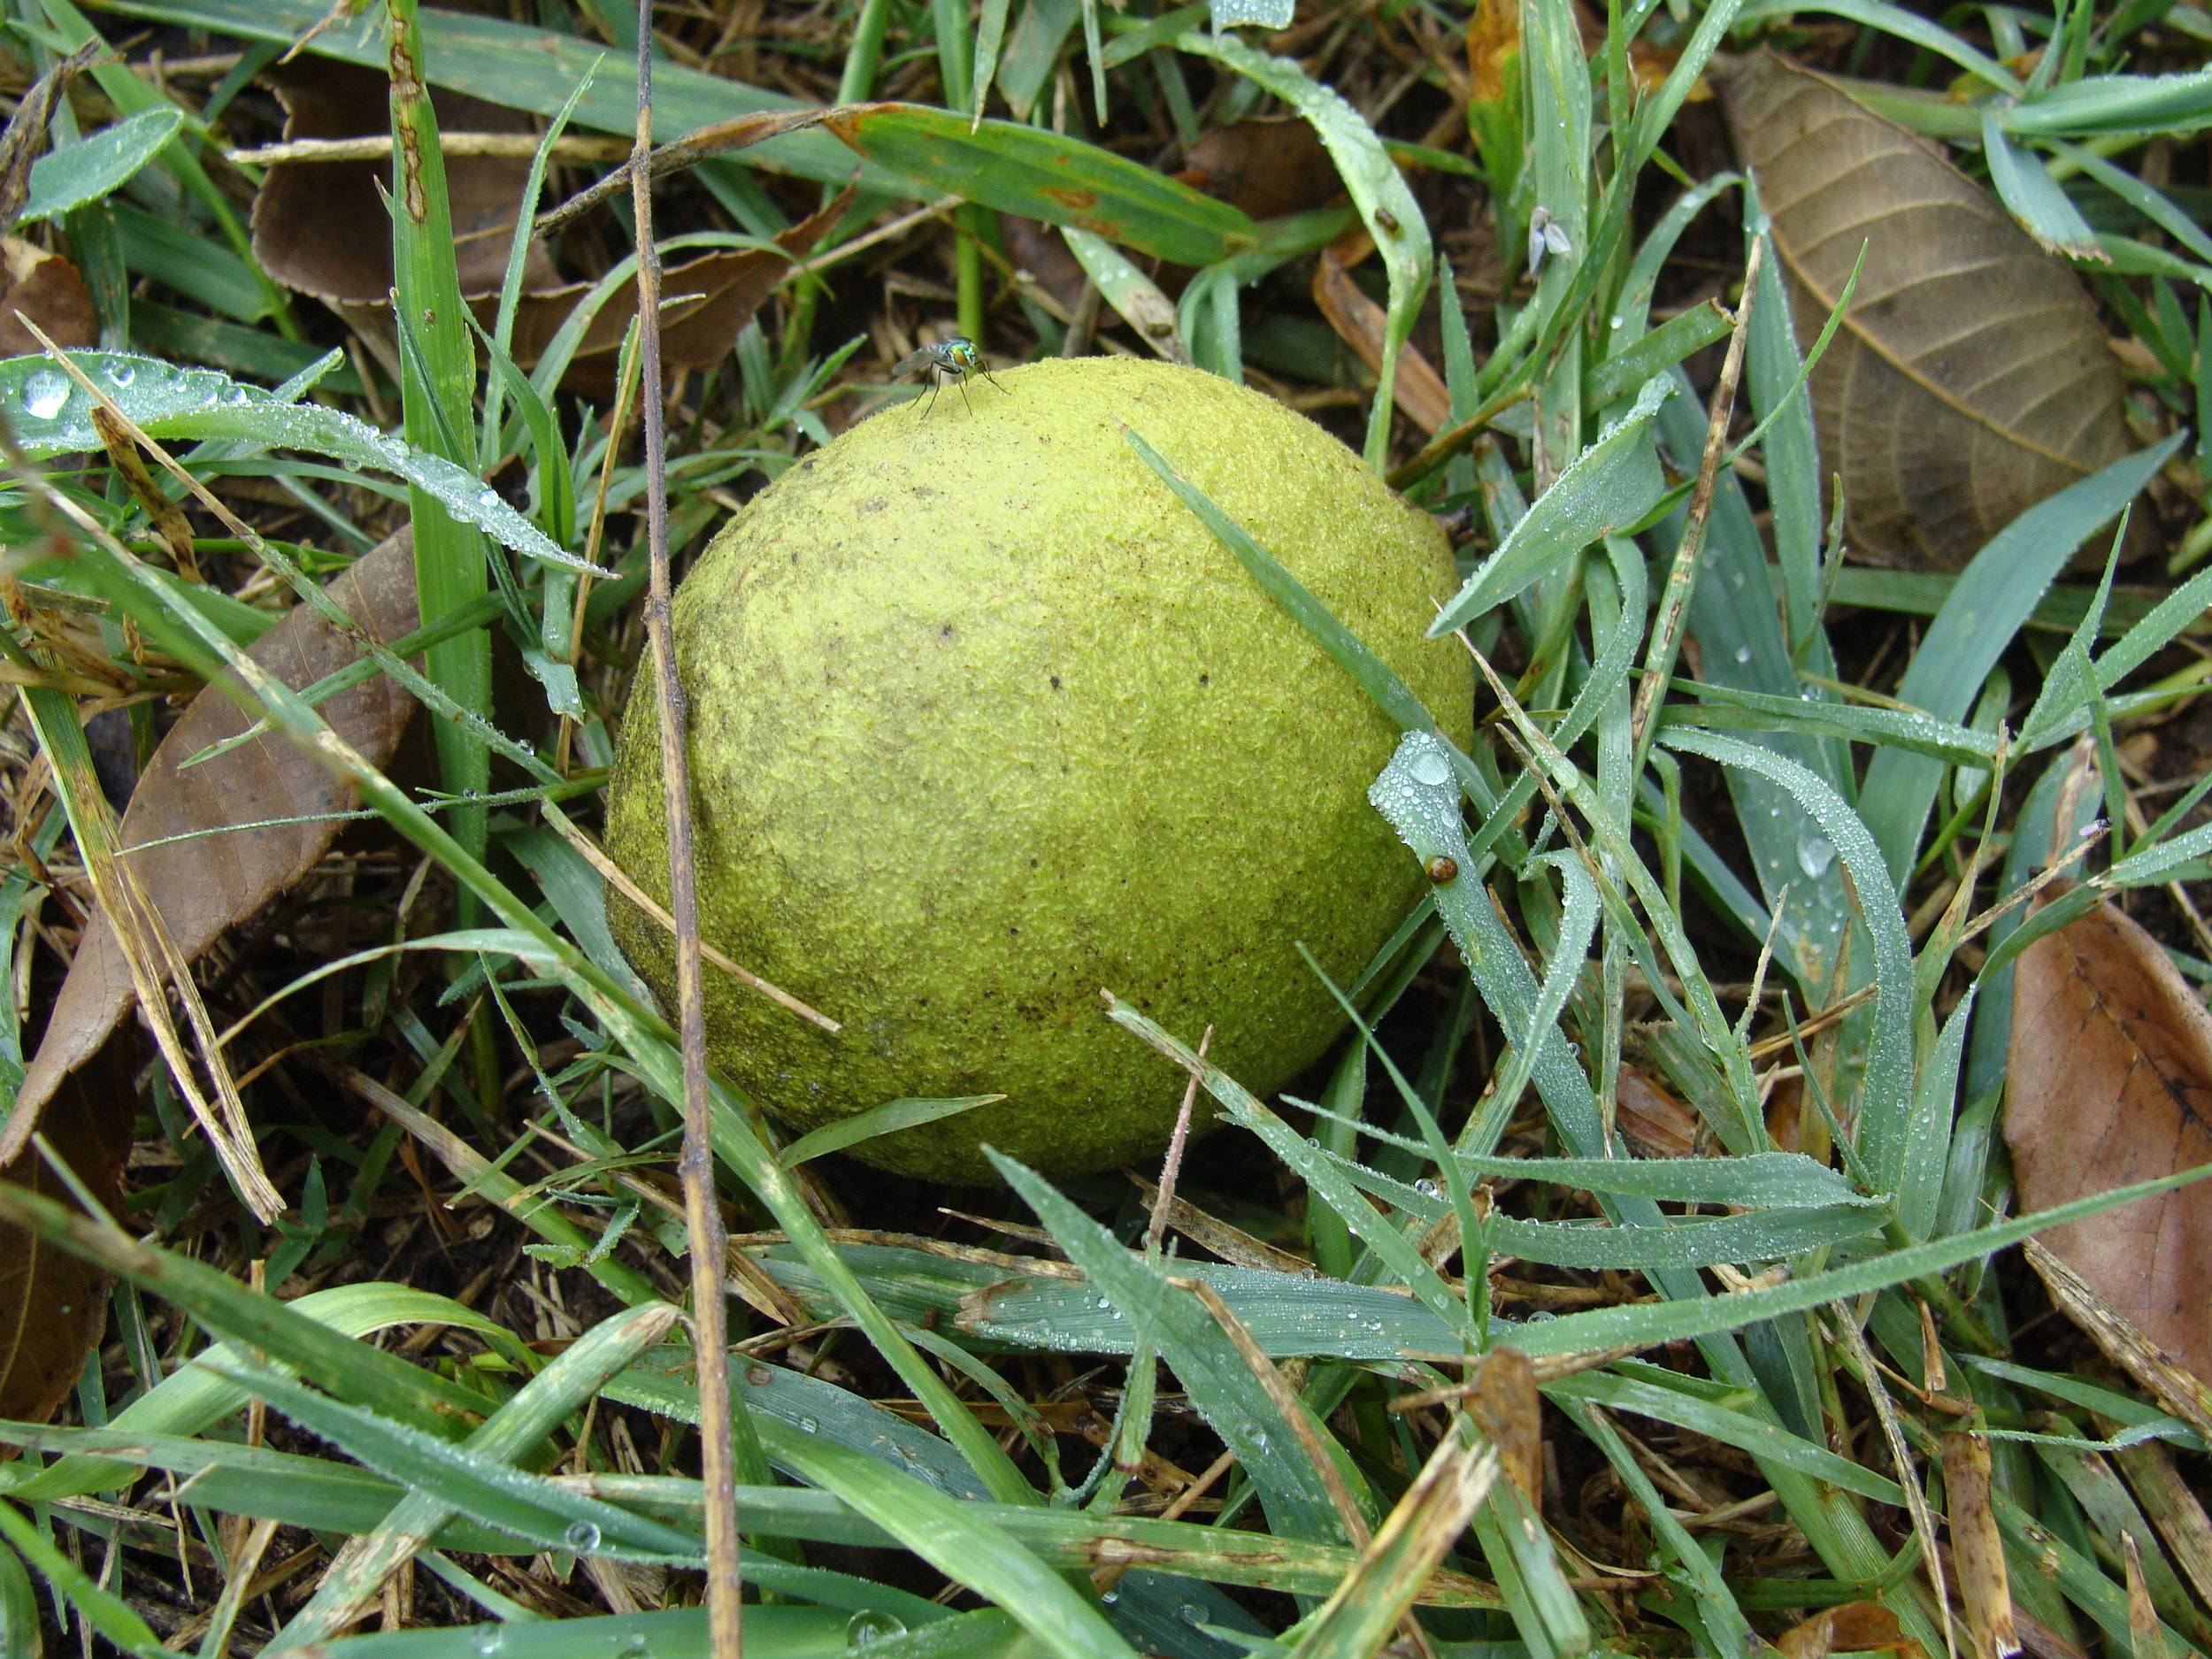
little 'dye ball' just waiting for me to pick it up
The best time to gather the nuts is in the Fall when they are still green and newly fallen off the tree. I have read that if the nuts rot and turn black on the ground the dye may be damaged; however, I have also dyed with these black hulls and obtained similar results. You can dye with the fresh hulls or you can freeze them for year round dyeing. I have done both.
NOTE THAT WALNUTS WILL STAIN SKIN FOR DAYS. WEAR GLOVES WHEN HANDLING!!!
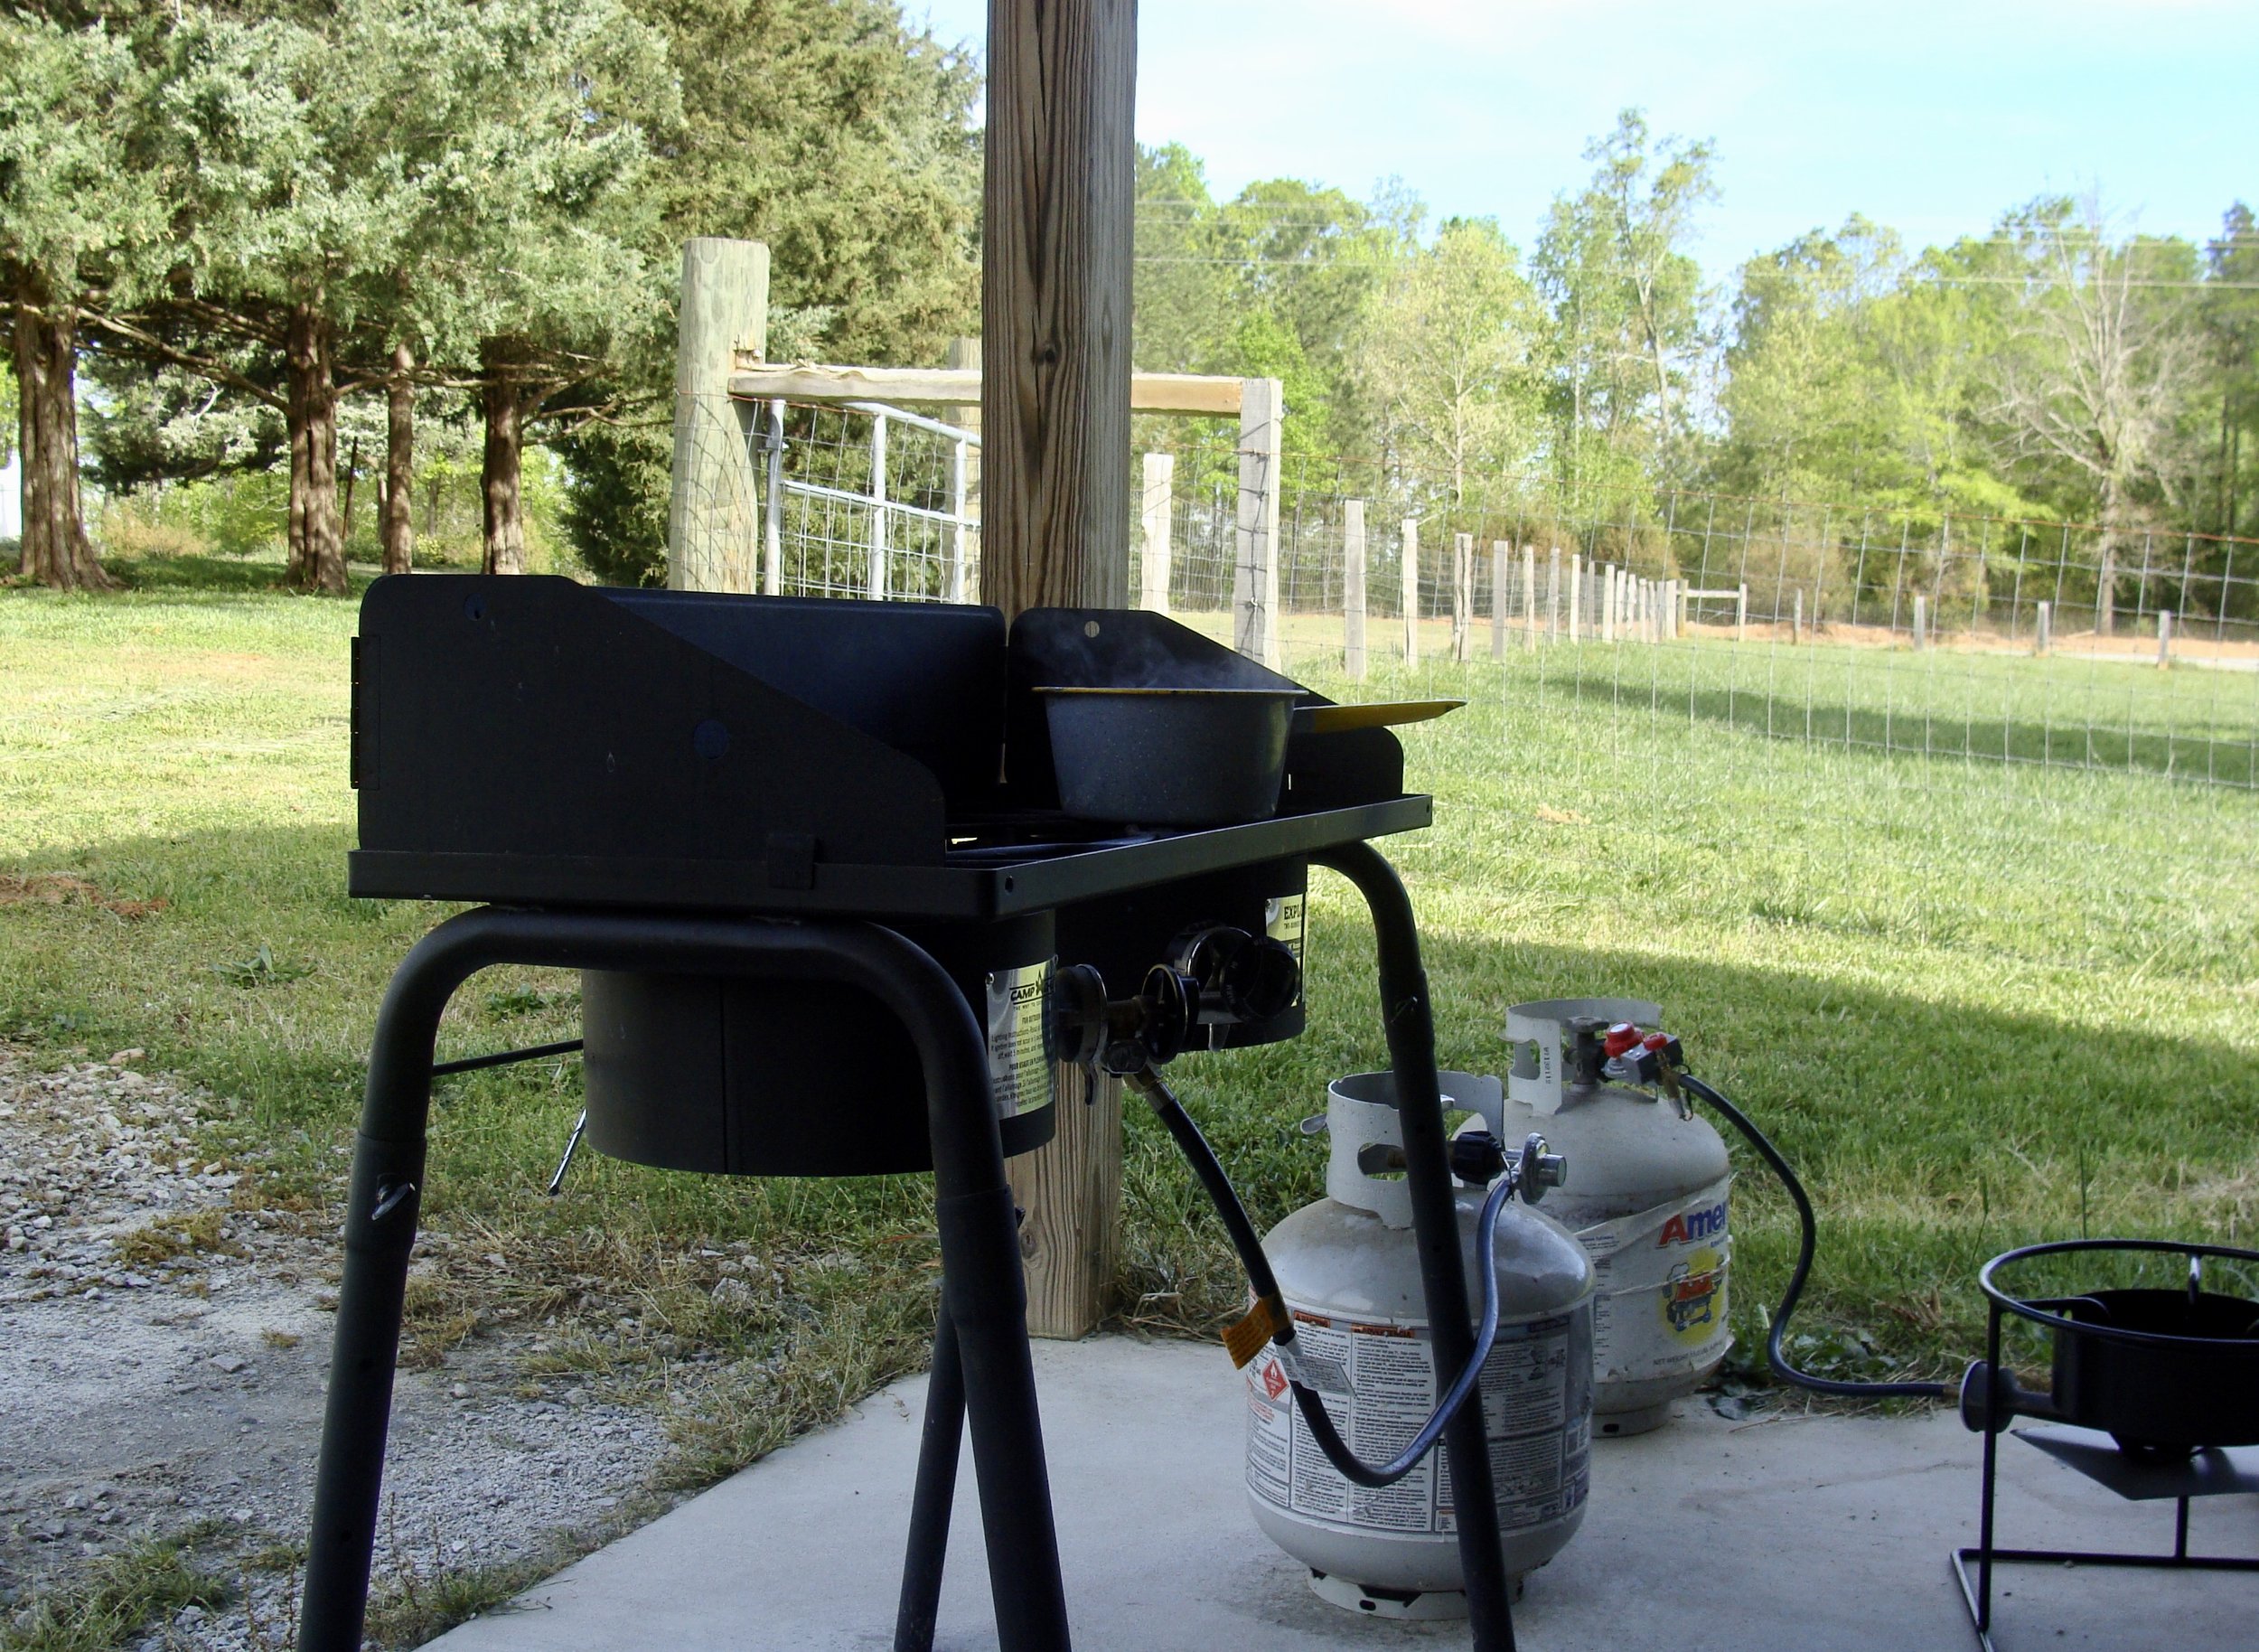
ALSO NOTE Walnut WILL stain countertops and kitchen sinks! So I dye with Black Walnut outside using a portable propane burner and the barn sink.
1. My Dye Bath Preparation & Recipe
Place the whole hulls in a bucket or large stainless steel pot (that will not be used for cooking). Add enough water to completely cover the hulls. Place a lid on top. Leave the bucket or pot outside, periodically checking to add more water if necessary. About half way through the soaking process, I "smoosh" the hulls to crack their exterior and allow the juiciness to ooze out.
I typically soak for two days, at the very least, overnight. The water should be a deep brown. Using a strainer, pour the contents over another bucket or pot to strain the large chunks of walnut from the soaking water. Discard the solids and save the dye “liquor". Optional - Strain the liquid one more time through cheese cloth. This will remove any residual small pieces from the liquid.
Place the wetted fiber or fabric in this liquid dyebath. You may have to add more water to allow the fiber or fabric to be able to move freely in the dye. Slowly bring the dye bath up to a simmer. Occasionally, stir the pot gently to allow for an even take up of color. Simmer for 30 minutes. If the color is satisfactory (color will be lighter upon drying), remove the fabric and rinse with water until the water runs clear. Hang to air-dry. Note-If dyeing wool, to avoid felting, turn off the burner and allow the pot to cool before removing and rinsing. If the color is not intense enough, simmer for 30 more minutes. If a darker color is still desired, turn the heat off and leave in the dyebath overnight.
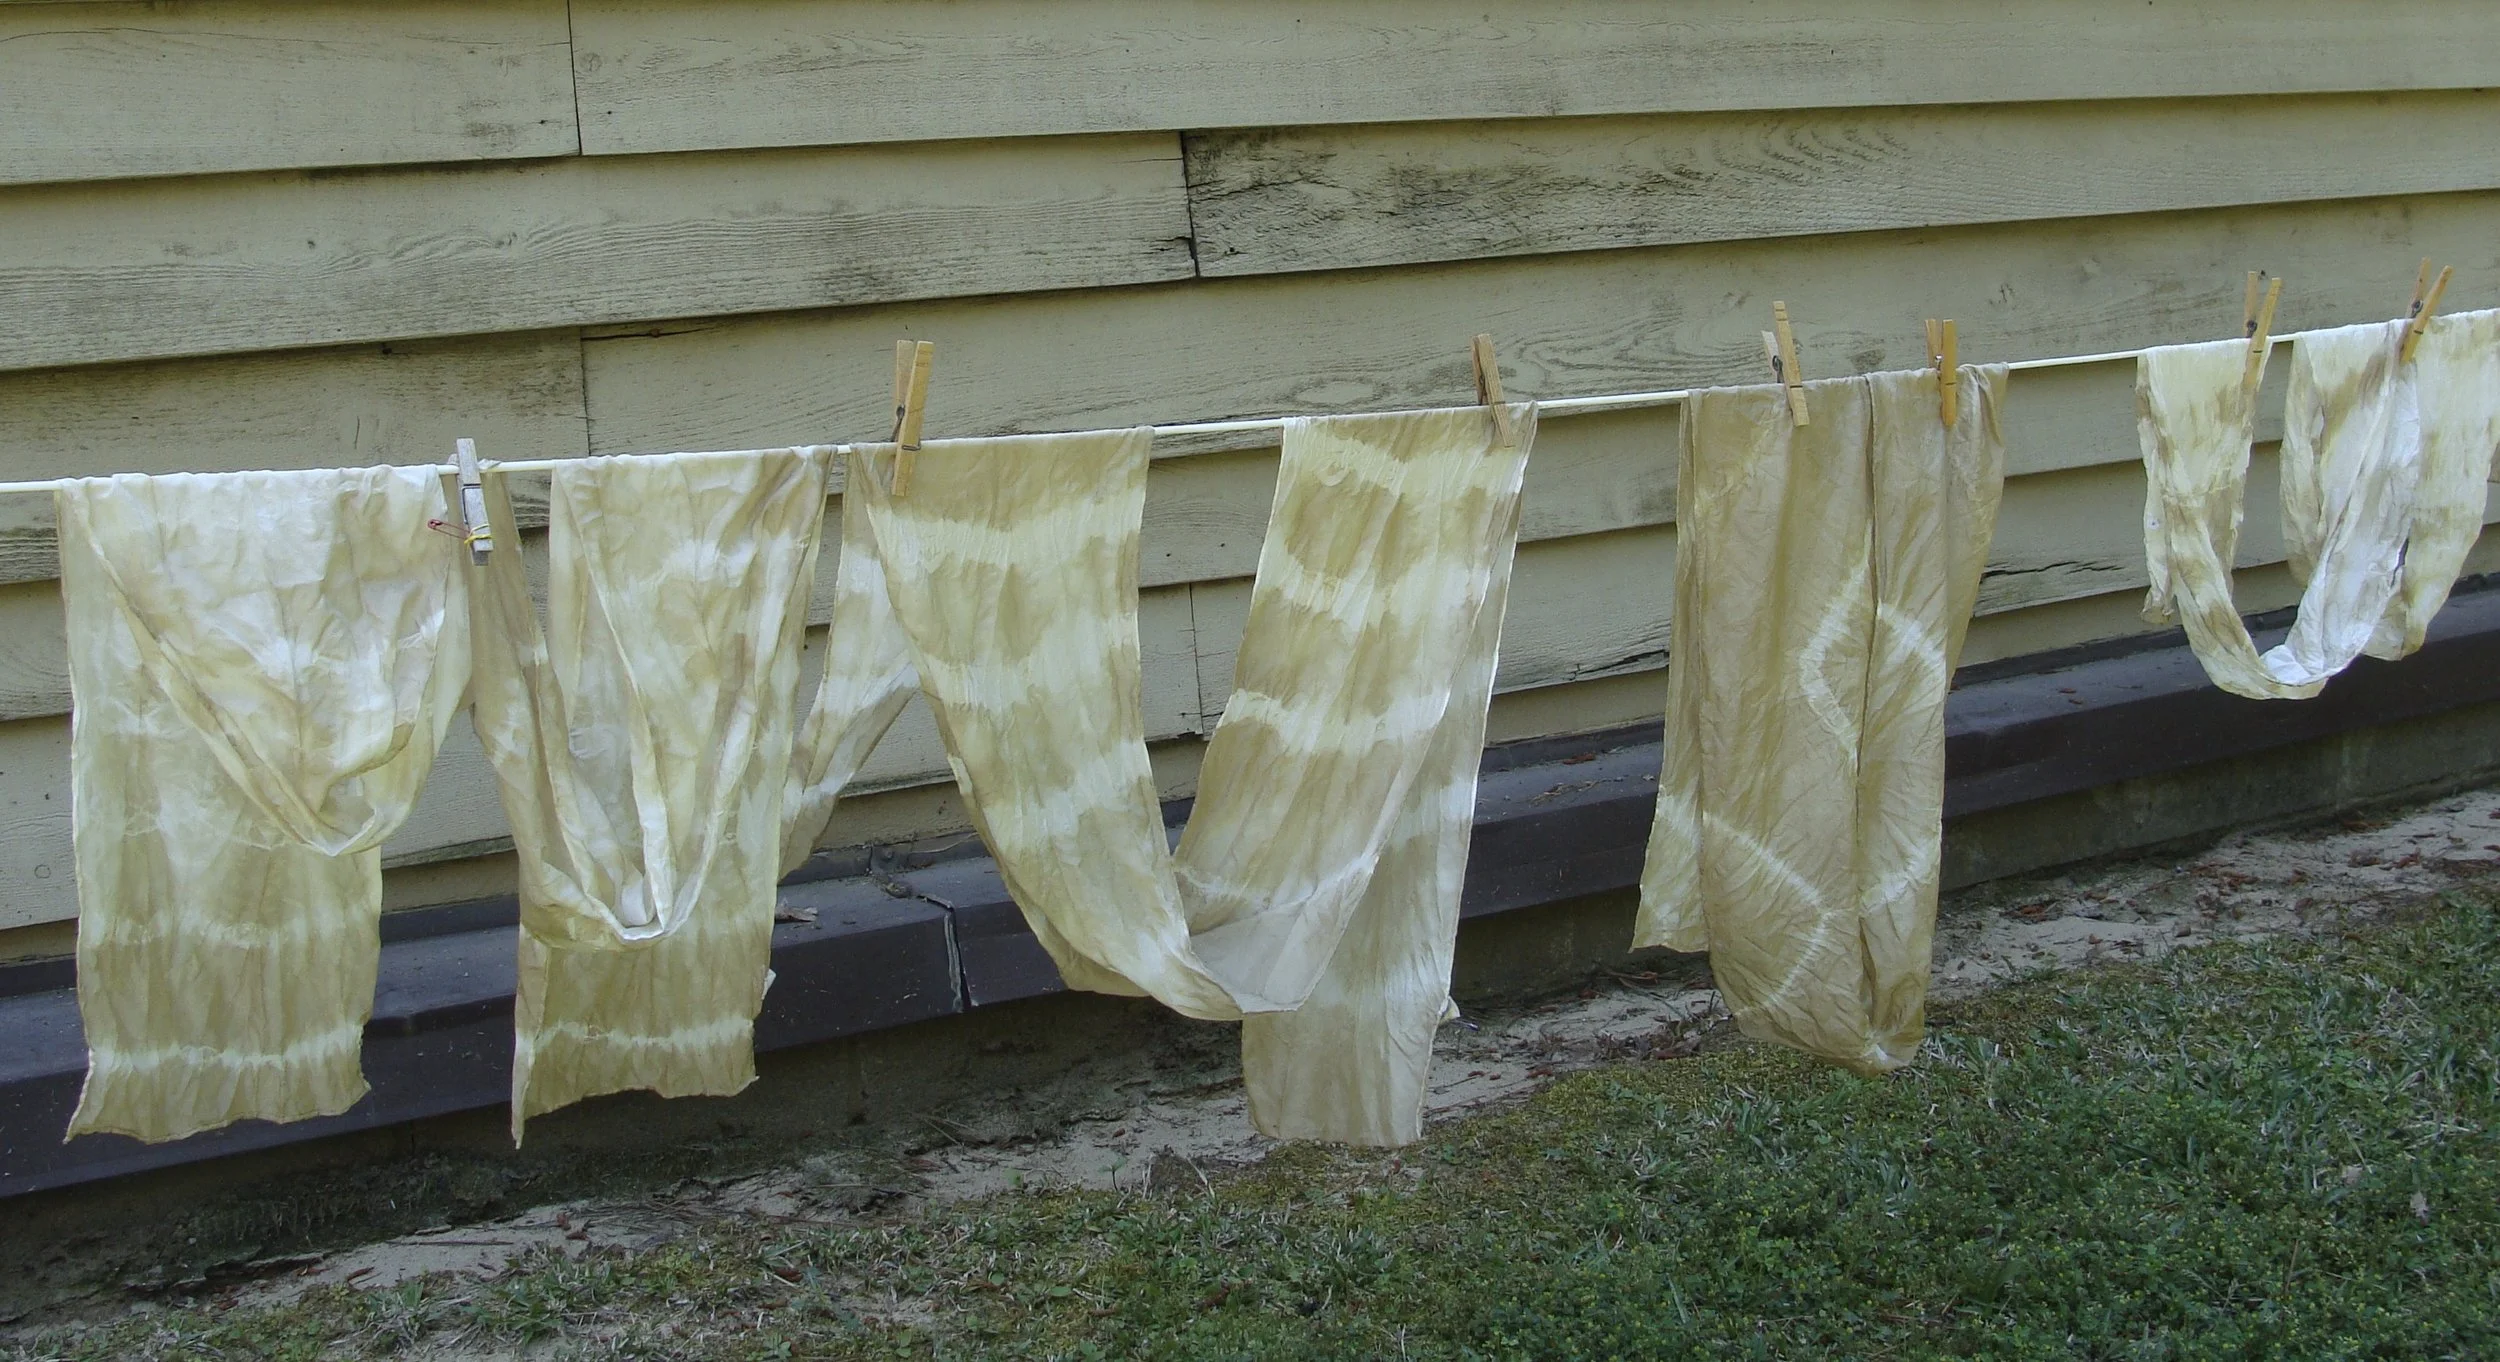
In the photo below, the silk scarf farthest on the left was simmered for an hour; the other three scarves simmered for 30 minutes. Shibori techniques were used to make the patterning.
I've shared my Black Walnut recipe that I've gleaned from reading lots of print and online sources. Here is a free PDF download of my Black Walnut dyeing process.
I'd also will share two additional recipes from dyeing gurus. The first is from Catharine Ellis, a master weaver, dyer, and teacher. It is an excerpt from her SEPTEMBER 11, 2016 blog post. The second recipe is from Trudy Van Stralen, a well known and respected natural dyer, teacher, and author of Indigo, Madder, & Marigold.
2. Catharine Ellis Recipe
I have learned that the secret to dyeing with black walnut is slow dyeing and lots of patience. I put the entire nut(s) in a mesh bag (fresh or dry), cover with water and simmer until the outer skin (the exocarp) breaks open, releasing the soft husk underneath which contains the dye. Then I cool the bath a bit, add the fiber, leaving the entire nut in the bath (in the mesh bag) during the entire dyeing process. The mesh keeps the fiber clean. I heat the dyebath slowly and leave it for a long time. There were many occasions that I was disappointed in walnut dye, only to finally learn that it takes TIME. I still have to resist the temptation to add more walnut to the bath during the first hour of dyeing, remembering that the dye will get darker with a longer bath.
I calculate about one fresh/frozen nut per 20 grams of fiber (or about 350%). If I am using dry walnuts I will double that amount, at least. Many more dry walnuts will be required to achieve the same color as the fresh walnuts.
3. Trudy Van Stralen Walnut Recipe
Use dried walnuts (or 5 times the amount if fresh).
Weigh out the nuts and put them in a pot of water to soak overnight. If you place them in a net bag it’s easier to remove them later.
The next day, bring the water to a vigorous boil and boil hard, covered, for at least 90 minutes.
Strain the dye bath into another pot. Straining is important, as any remaining bits of hull will make dark spots on the fiber.
Add wetted fiber to the dye bath, bring it to a boil, and keep at a gentle boil for 90 minutes (not just 60 minutes, as for other dyes). Remove the dyed fiber and rinse well.

Natural Dye Workshop @ Flora & Fiber
I teach Natural Dye workshops. A typical workshop is 1 1/2 hours and includes a presentation on natural dyes, a hands-on dye project, and a narrated walking tour of the farm. I can also customize a program for you. If you or your group is interested in scheduling a workshop, please contact me via my contact page.
References:
Indigo, Madder & Marigold: A Portfolio of Colors from Natural Dyes by Trudy Van Stralen
Wild Color: The Complete Guide to Making and Using Natural Dyes by Jenny Dean
Natural Dye: Experiments and Results a blog by Catharine Ellis
Native Trees of the Southeast by Kirkman, Brown, & Leopold